The H5P Interactive video content type helps to makes videos more engaging for the learner. Users can add multiple interactions at intervals throughout the video.
The follow H5P content types may be added to your video:
- Multiple choice questions with one of more correct answers.
- Free text questions
- Fill in the blank questions
- Drag and drop questions
- Interactive summaries
- Single choice question sets
- Mark the word activities
- Drag and drop text
- Images
- Tables
- Labels
- Texts
- Links
When to use Interactive videos
Interactive videos are perfect when you already have a video clip that you want to enrich with interactive elements.
You can facilitate differentiated learning by adding in-depth information such as pictures, tables, text and links that the learner can interact with during video playback.
Include puzzles for the learners to solve at any given time in the video by adding Multichoice questions, Fill in the blanks, Drag and drop questions and Summaries.
Video files
A video clip is the cornerstone of any Interactive video.
Note: The .mp4 video format will work in most browsers. However, you should provide an alternative video in webm format just to be sure.
In order to convert an mp4 video to a WebM format, you can use an open-source converter such as Miro.
Creating an Interactive Video
You can access H5P in Canvas through the Rich Content Editor (RCE), which is accessible via the edit view of Page, Assignment, Discussion Board, Announcement and Quiz questions.
For this example, we will be adding H5P onto a Canvas page. The first thing you will need to do is either open the page you want to embed the H5P content into or create a new page. Then click the ‘Edit’ button which will open the RCE. (You will automatically go into edit mode if you create a new page.)
Next, you will need to locate H5P in the RCE toolbar.

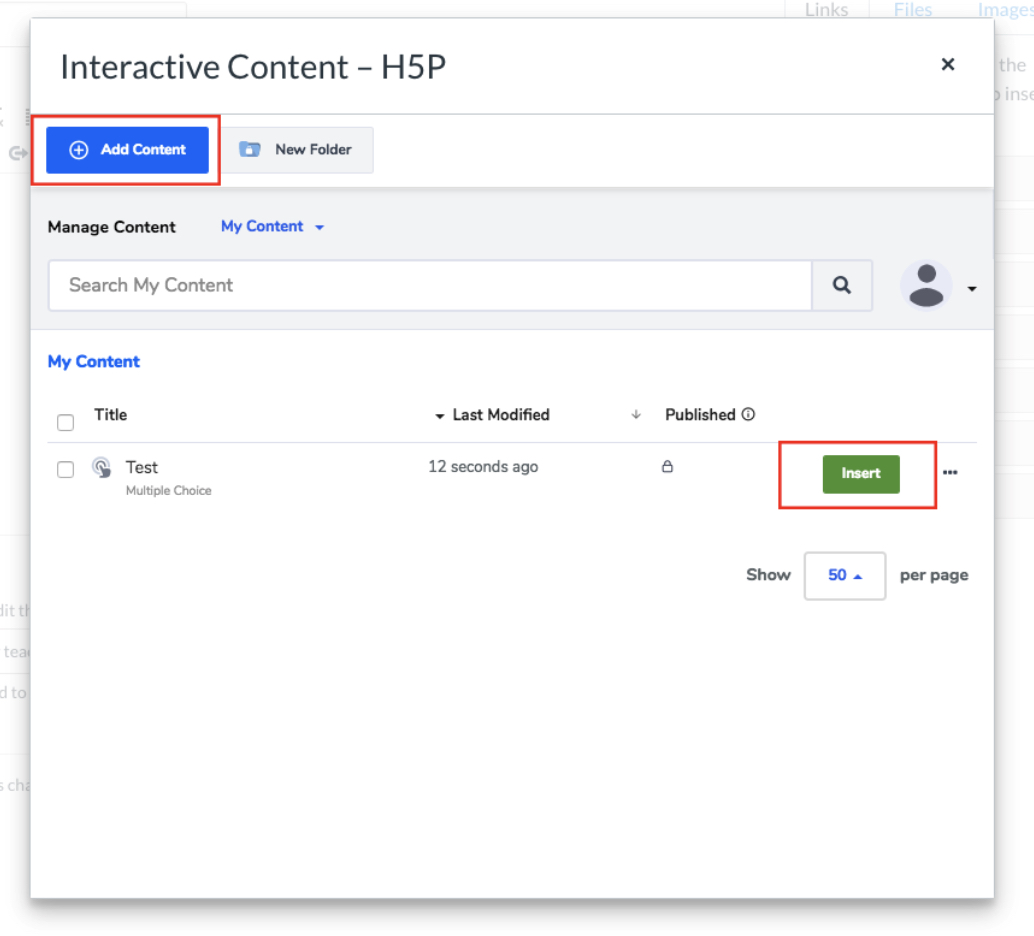
Clicking on that menu item will open a pop-up showing your H5P library. From here, you will have the option to either insert previously created content or create something new.
Select the Add Content option.
In the search bar type 'Interactive video' and choose this from the list generated.
Interactive video editor
The Interactive video editor should appear.
The top part of the editor looks like this:
Add a title. This will not be visible to your learners but can be used for searching, reports and copyright information.
The Interactive video content type consists of three tabs:
- Upload video
- Add interactions
- Summary task.
These three steps represent a natural workflow for creating an Interactive video.
By default, the Upload video tab is displayed when you create a new Interactive video, and this is what you always want to start off with.
Upload a video
Here's where you can add the video clips that our Interactive video is based on.
Click the + icon under Add a Video
The follow pop up appears
Click the Upload video file to upload your video or paste a link to your video in Paste YouTube link or other video source URL:
Browse to where you downloaded the mp4 video file from step 1 and upload the video. A square black icon with mp4 written in appears:
Click the plus icon again to add an alternative video format to ensure support in all browsers. Locate and upload the video clip in WebM format, that you converted earlier.
Add relevant labels for both quality levels.
Now, edit the copyright information by clicking Edit copyright below the black video clip icons.
If you are using a Creative Commons licensed video clip, add the information below in the Edit copyright dialog.
Once the video files are added and copyright information is entered, you're ready to add interactions.
Add interactions
Click the Add interactions tab in the top of the editor. The video clip that was added is previewed:
You can use the toolbar above the video clip to add interactions:
We will now add two interactions to our video
1. Text Interaction
2. Image Interaction
1. Text interaction
In this example we will add a short text about Redcurrants which the learner can choose to read.
First, add a Text interaction by clicking the Text  icon on the toolbar, then drag it on top of the video and drop it in the middle of the video.
A dialog box will appear when you drop the interaction.
To have the text interaction be visible for the first three seconds of the video. Type in 0:00 as start time and 0:03 as end time in the Display time field.
If you don't want the video to stop automatically when the interaction appears, leave the Pause checkbox unchecked. In this example we will leave the video running when the interaction appears.
The Label is a text that will be displayed next to the interaction icon as a short description of what the learner can expect to find in the interaction. Type the label into the Label field.
In the Text field, add the in-depth information about your subject.
Click Done. You will now see that an icon with your label has been added to the video.
A white dot will appear in the timeline of the video, to indicate that interaction will show at this point in the video:

Play the video to make sure the interaction is visible at the correct time.
To edit the interactive elements double-click on the interaction icons that are on the video.
2. Image interaction
Add an Image interaction in the same way we added the text interaction.
Click the Image  icon, drag it onto the video and drop it where we want it to be placed.
 In the first Image interaction, add the desired picture.
In the Display time field, insert 0:03 - 0:03. This means that you want the image to appear 3 seconds into the video.
In this example we have checked the Pause Video checkbox so the video pauses when the interaction appears.
Add the Label, Alternative text and Hover text fields. Click Done.
Remember to add appropriate license information when using multimedia you don't own the rights to.
Finally, add another image and use the same settings as the first Image interaction shown above.
Click Done when you have added the new image interaction.
You add and place them in the same way as the Text and Image interactions.
Bookmarks
Bookmarks are used to indicate a new topic, an important interaction, or an event within the video.
You will find the option to add a bookmark in the Add interactions section of the editor
Bookmarks are displayed in the bookmarks menu, which is opened by clicking the Bookmark button next to the Play button
Move the play-head to 0:00 and click the Bookmark button.
You add a bookmark by moving the play-head to a desired point in the video and clicking the Bookmark icon.
The Bookmark dialog box will show the time of the video you want to add a bookmark e.g Add bookmark at 0.12
Click on this text and you can add a label to your bookmark.
Each bookmark is indicated with a vertical grey line on the seek-bar.
Learners can jump directly to a chapter by clicking the related bookmark in the bookmark icon .
You can edit a bookmark label by click on the bookmark text when you launch the bookmark icon.
You delete a bookmark by clicking the icon x in the top right of the bookmark label.
Summary
At the end of an Interactive video, you can add a Summary.
The Summary is intended to make the learner reflect on the learning content presented in the video.
Add two or more statement groups in the Summary.
In the first Statements group, add your statements:
The first statement is the correct one. You should now have something like this:
To create another Statements group, click Add Statements.
Add your statements similar to the first statement group. The first statement will be the correct one but the statements will be randomised when presented to the learner.
Finishing up
Save and Insert to view your finished Interactive video.