When to use the Documentation Tool
The Documentation Tool content type aims to make it ease creating assessment wizards for goal-driven activities.
It can also be used as a form wizard.
While editing, the author can add multiple steps to the wizard.
In each step, the author can define which content goes into that step.
Content can be plain text, input fields, goals definition and goals assessment.
Once published, the user will be taken through the steps of the wizard.
On the last step of the wizard, the user can generate a document with all the input that has been submitted.
This document can be downloaded.
Below is an example of the Documentation Tool which we are going to create in this tutorial:
Accessing H5P in Canvas
You can access H5P in Canvas through the Rich Content Editor (RCE), which is accessible via the edit view of Page, Assignment, Discussion Board, Announcement and Quiz questions.
For this example, we will be adding H5P onto a Canvas page. The first thing you will need to do is either open the page you want to embed the H5P content into or create a new page. Then click the ‘Edit’ button which will open the RCE. (You will automatically go into edit mode if you create a new page.)
Next, you will need to locate H5P in the RCE toolbar by clicking on the H5P icon
Clicking on that menu item will open a pop-up showing your H5P library.
Select Add Content.
A search bar will appear.
Type in Documentation Tool. Select Details and Use
Documentation Tool Editor
The Documentation Tool editor should now appear and it looks like this:
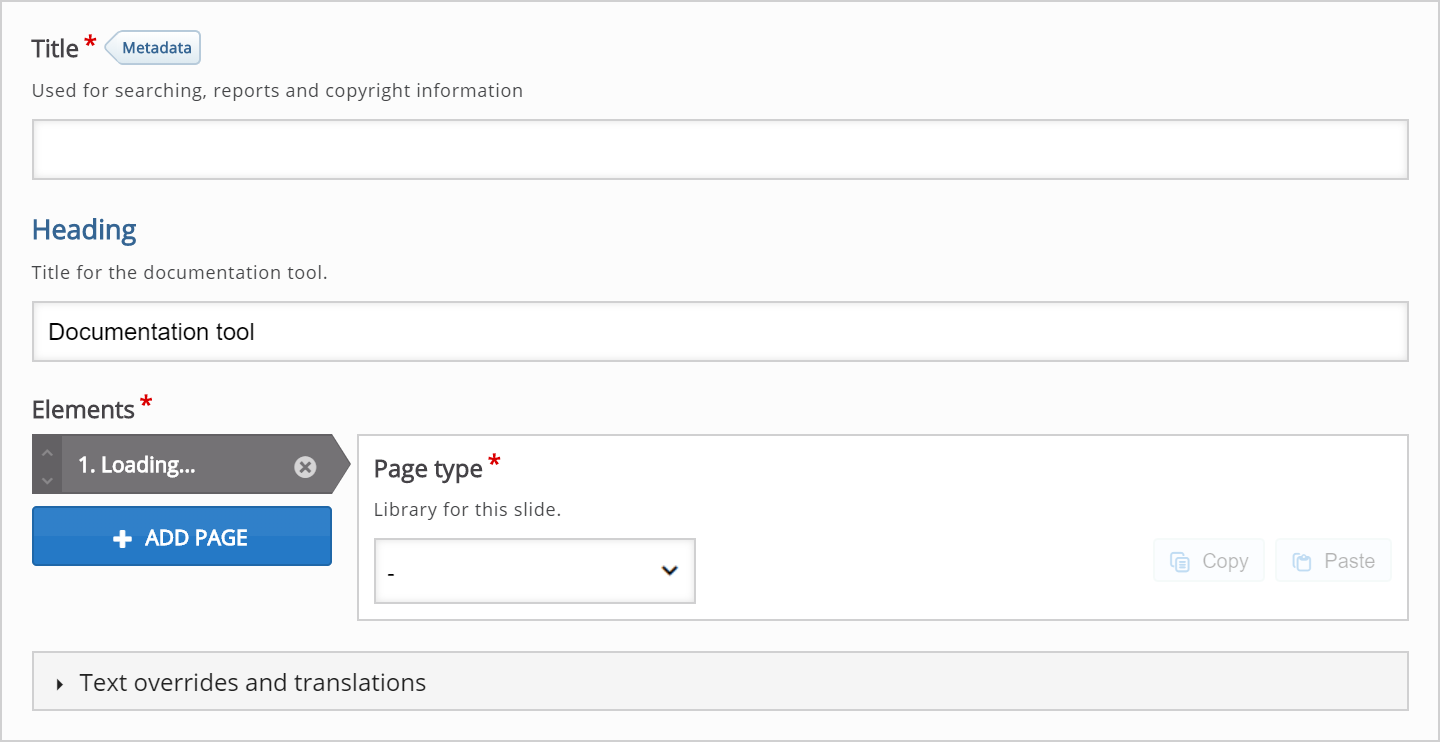
Title and Heading
Type the the title of your project in the Title field
Type the heading text in the Heading field.
The Heading will be displayed always throughout the tool even when you navigate to different pages.
Elements
When the Documentation Tool editor is launched, only one undefined content type is displayed below the Elements header. You will have something like this: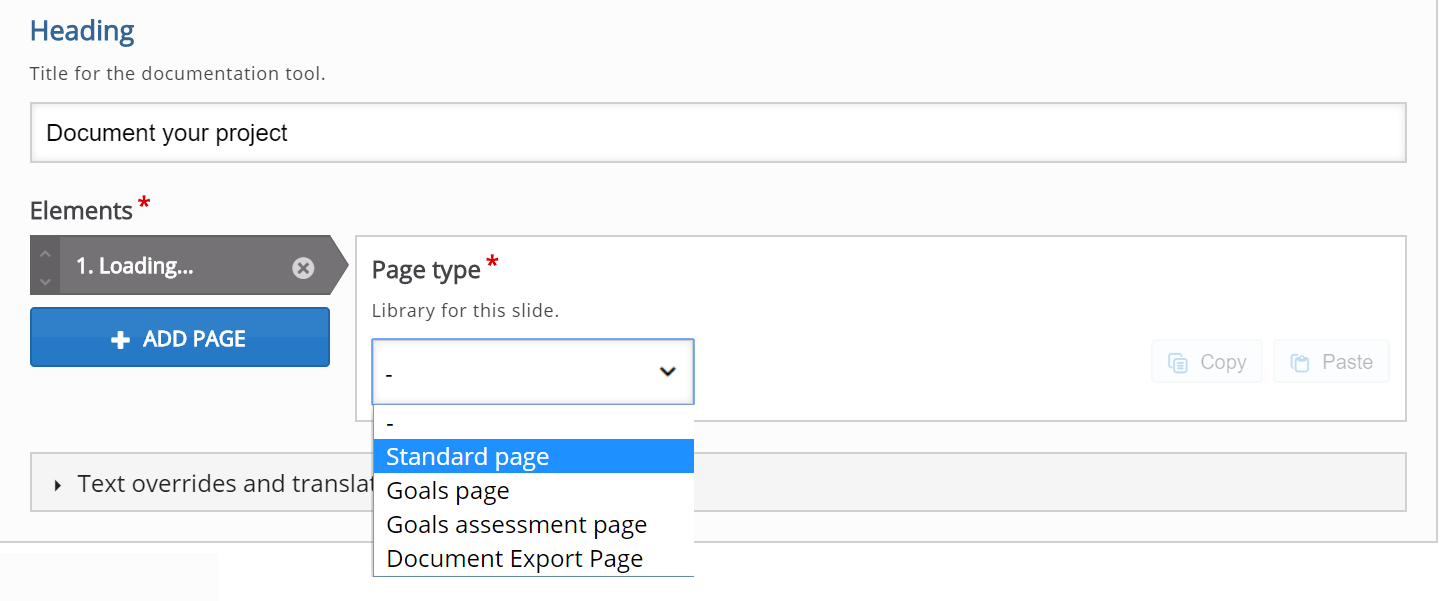
For this example we will add the actual pages that the Documentation Tool consists of.
- Standard Page
- Goals Page
- Goals Assessment Page
- Export Document Page
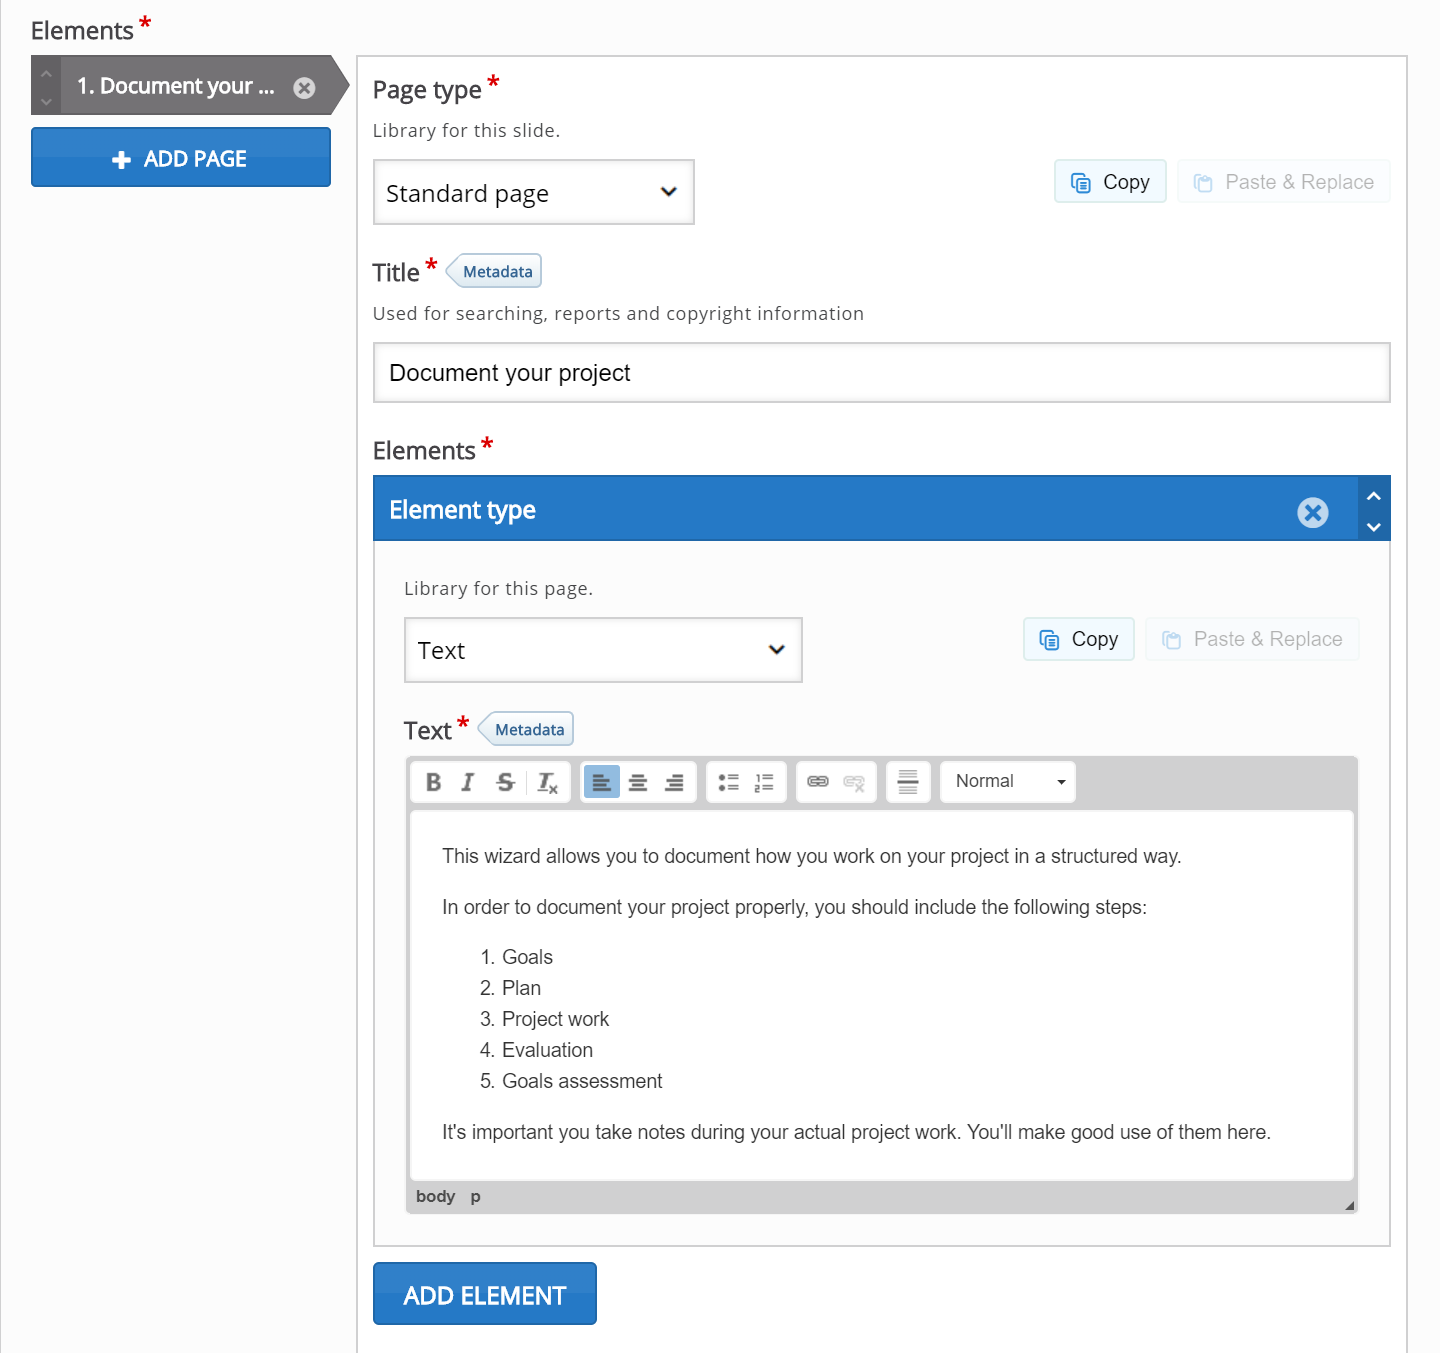
Add Standard Page
In the Content type dropdown, select Standard page.
This will load the Standard Page editor.
We will add the exact same content as in the Documentation Tool mentioned in the above example.
You should have now something like this:
- Add a title for the page
- On this standard page you can four options to choose from
- Text
- Accordion
- Image
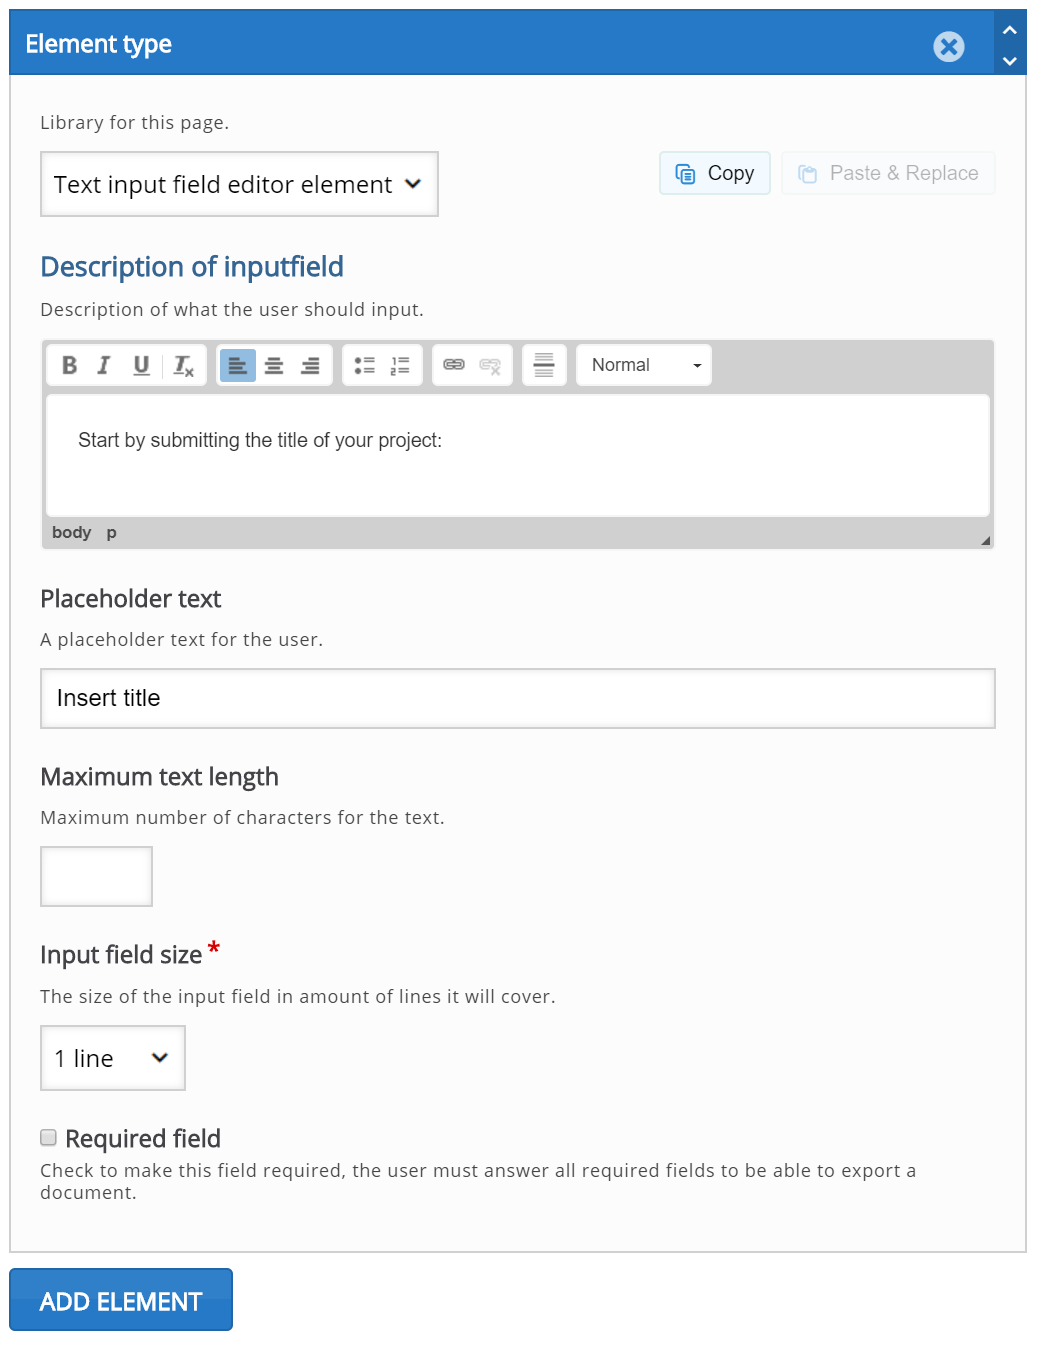
- Text input field editor element
In the example below we have used a Text option
Select Add element to add another option e.g. ‘Text input field editor element’.
This option allows you to give instructions to those completing the documentation tool to fill in information
You can set parameters e.g.
- Insert title
- Maximum no. of characters for the text
- How many lines of text are permitted
We will add 3 sections where users can complete information
1. In the first section we ask the user to complete the title of their project
Select Add element and add Text input field editor element two more times .
2. In the 2nd section we ask the user to include a start date for their project

3. In this example we ask the user to include their name.
Add Goals Page
Press the Add Page button to add another page to the Documentation Tool.
This time, we'll choose Goals Page from the drop-down menu.
The Goals Page editor will now appear.
Add the exact same content for Goals Page as in the Documentation Tool mentioned in the below example.
After adding content to the Goals Page you should have something like this: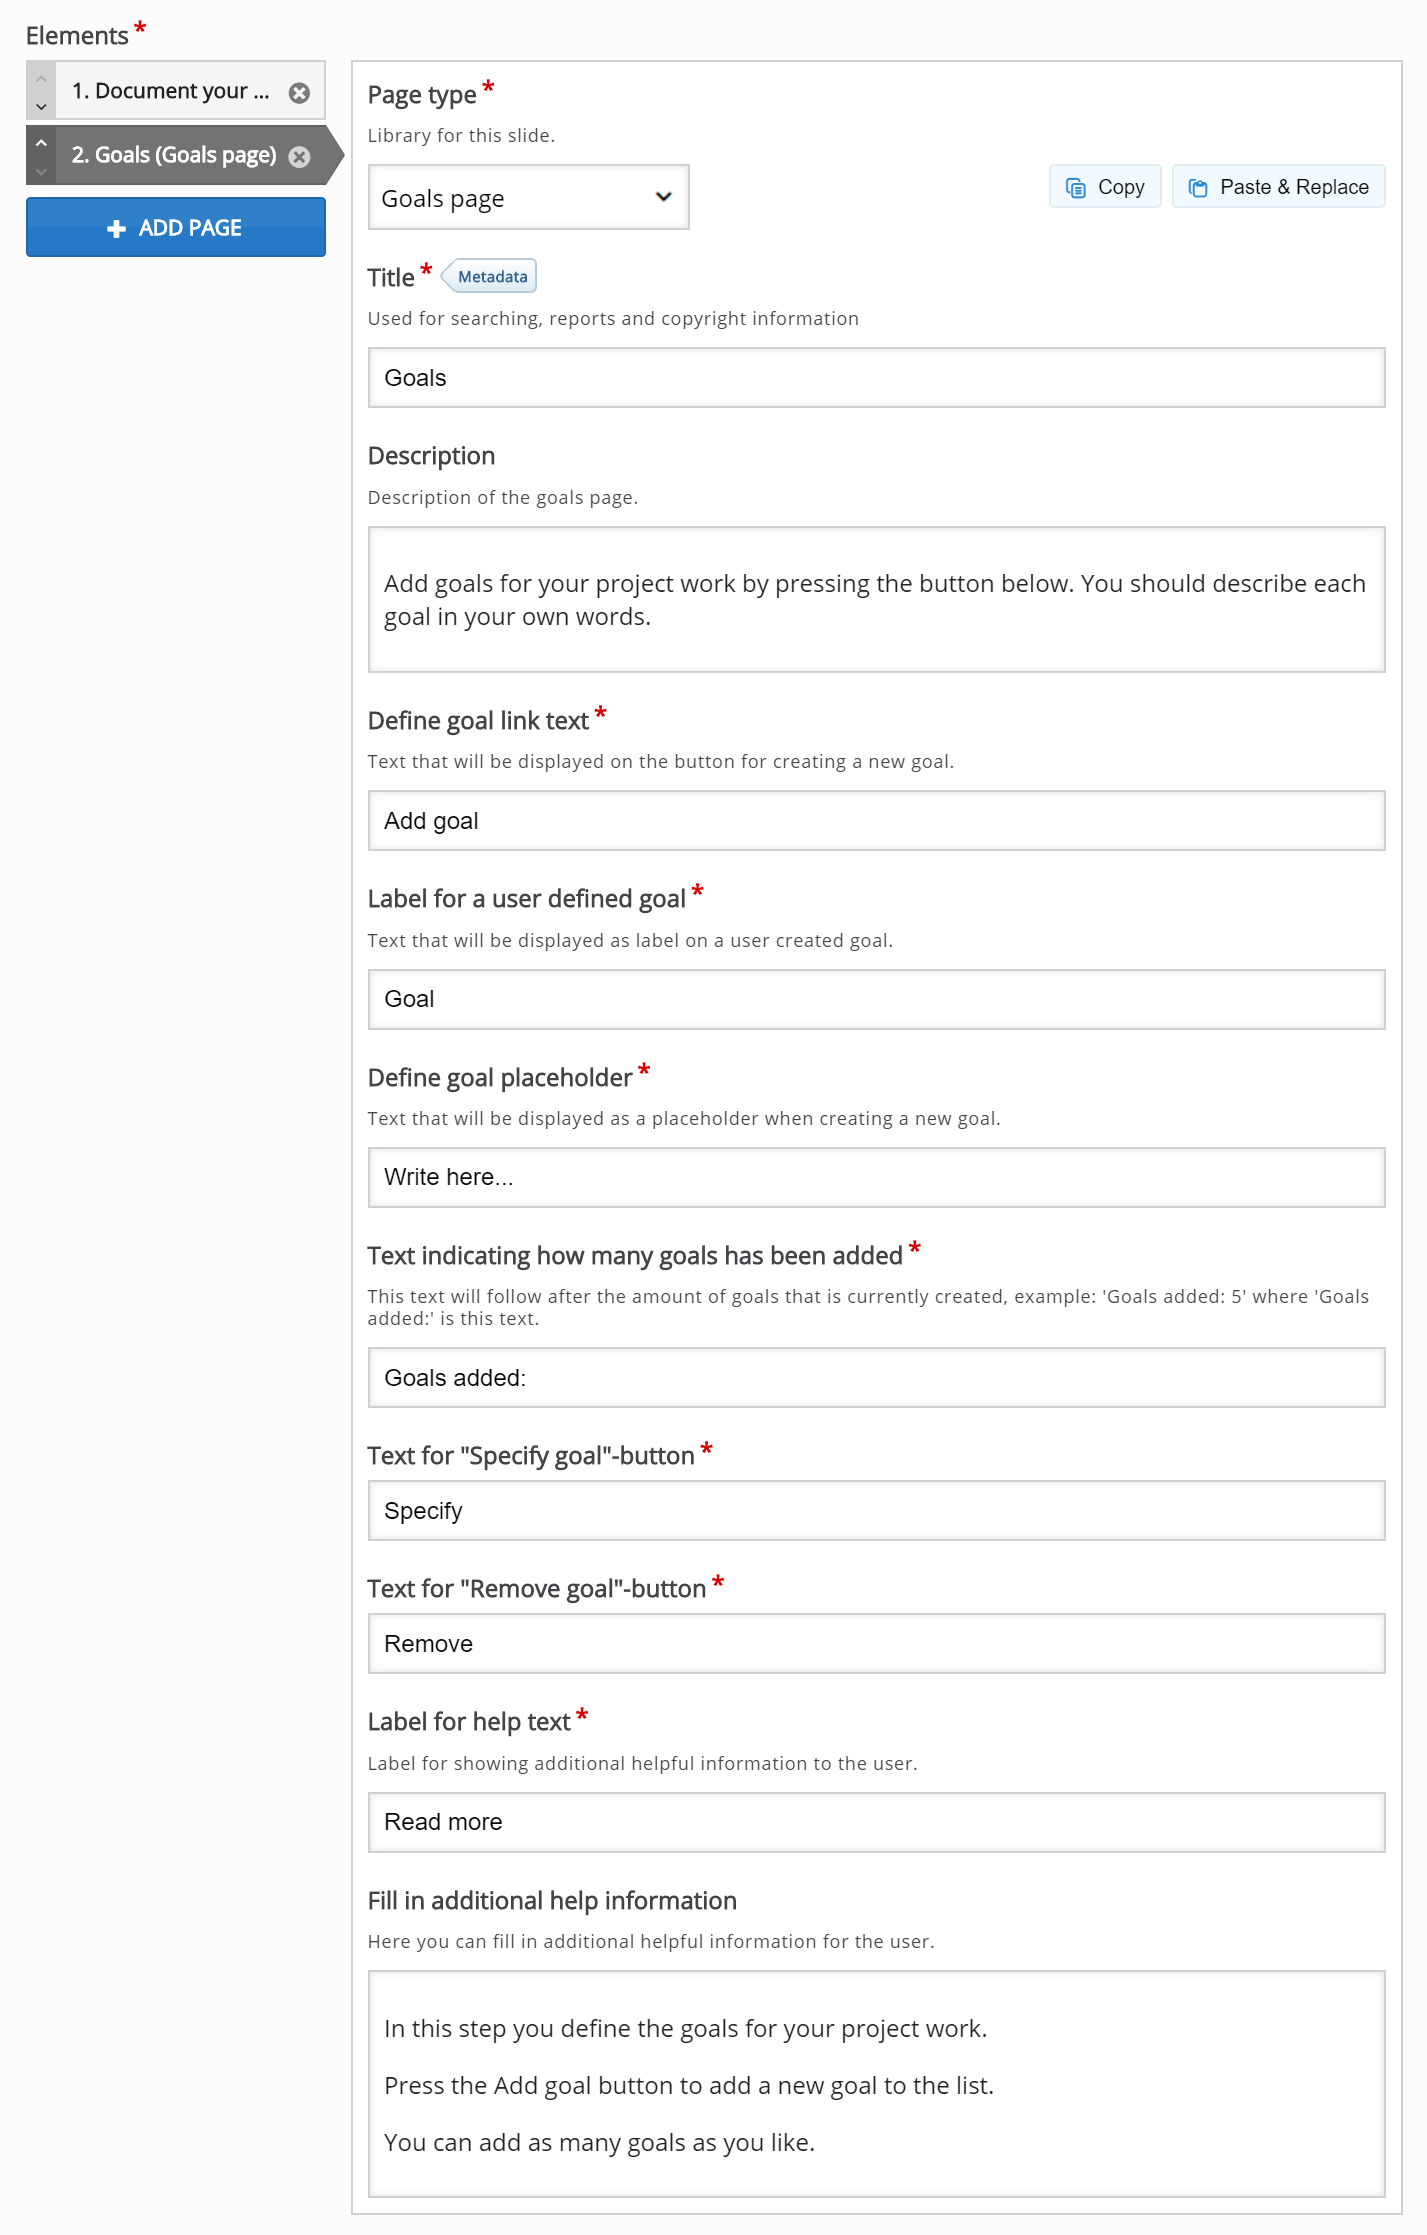
Add Standard Page
Press the Add Page button to add another page to the Documentation Tool.
This time, we'll choose Standard Page from the drop-down menu.
The Standard Page editor will now appear.
Add the exact same content for Standard Page as in the Documentation Tool mentioned in the below example.
In this example the elements chosen for the standard page are
- Text (describing the steps to complete)
- Text input field editor element (what you are going to do in the project)
- Text input field editor element (How you are going to do it)
- Text input field editor element (Why you are going to do it)
Finally the Label for help text is filled in with a title and help information is added
After adding content to the Standard Page you should have something like this: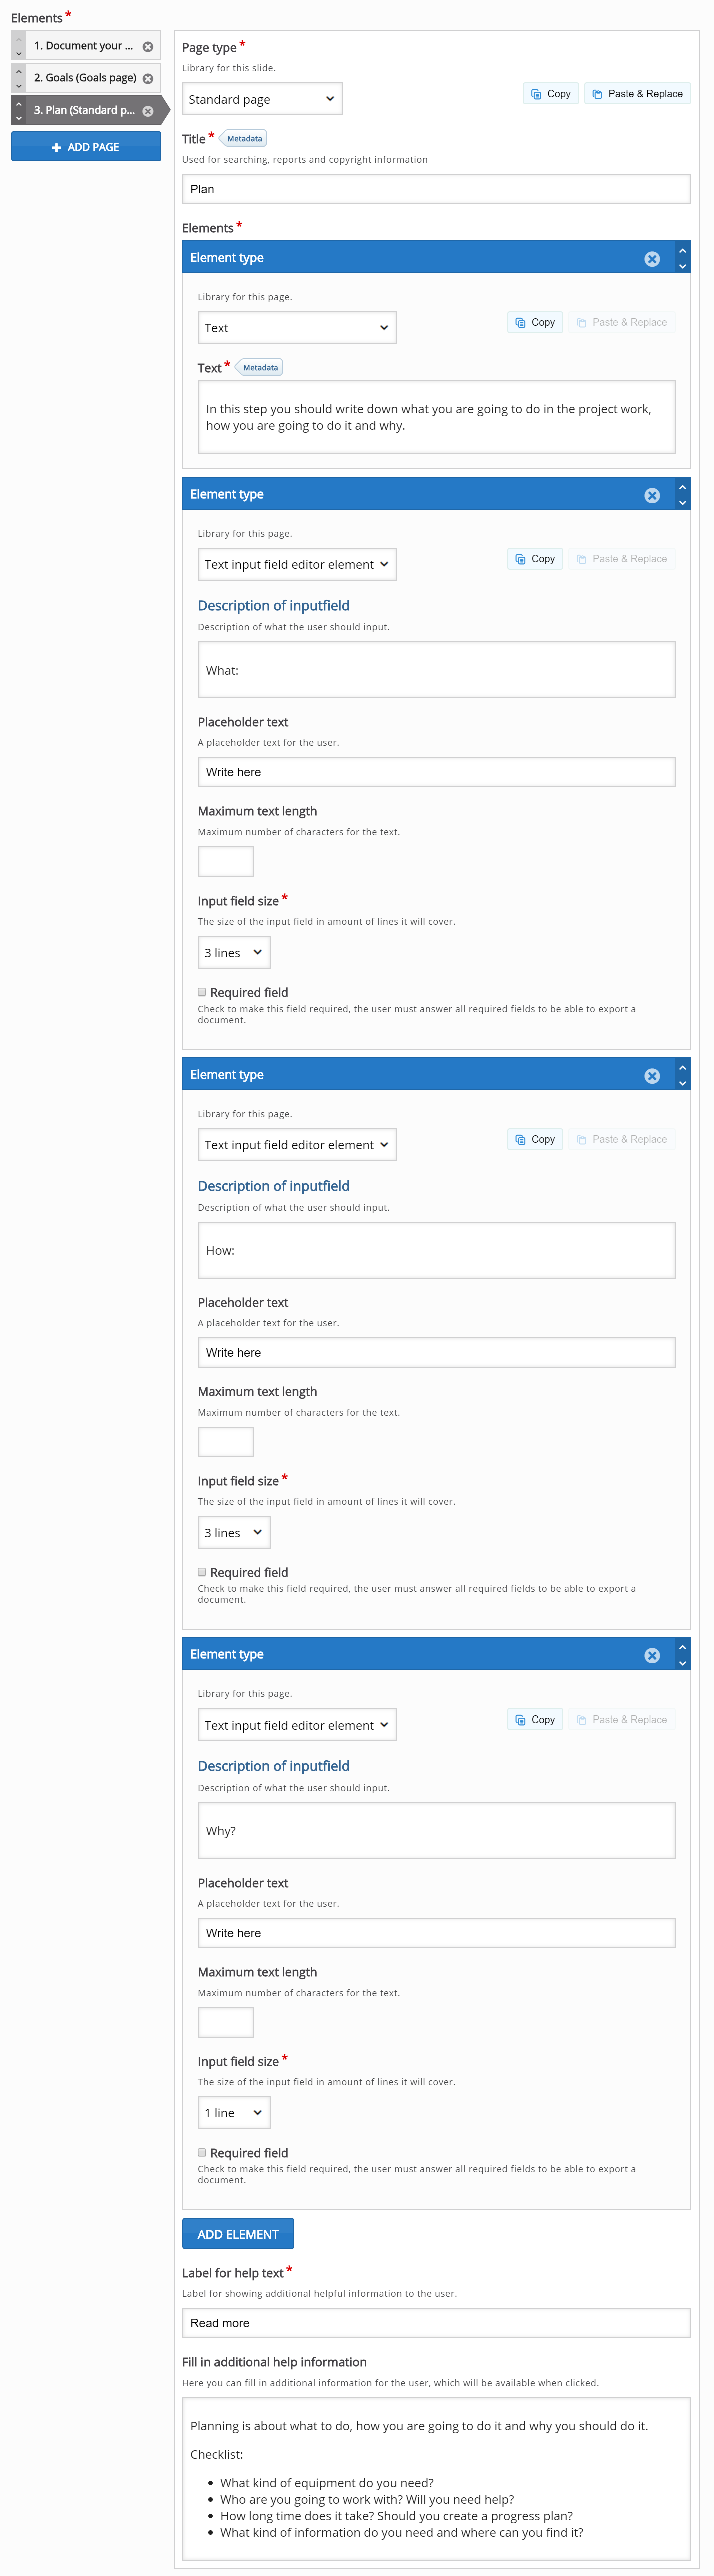
Add Standard Page
Press the Add Page button to add another page to the Documentation Tool.
This time, we'll choose Standard Page from the drop-down menu.
The Standard Page editor will now appear.
Add the exact same content for Standard Page as in the Documentation Tool mentioned in the below example.
In this example the elements chosen for the standard page are
- Text (Explaining what the user needs to include)
- Text input field editor element (User describes what they did working on the project)
Finally the Label for help text is filled in with a title and help information is added
After adding content to the Standard Page you should have something like this:
Add Standard Page
Press the Add Page button to add another page to the Documentation Tool.
This time, we'll choose Standard Page from the drop-down menu.
The Standard Page editor will now appear.
Add the exact same content for Standard Page as in the Documentation Tool mentioned in the below example.
In this example the elements chosen for the standard page are
- Text (Describing what information the user will need to include)
- Text input field editor element (user evaluates their work)
After adding content to the Standard Page you should have something like this: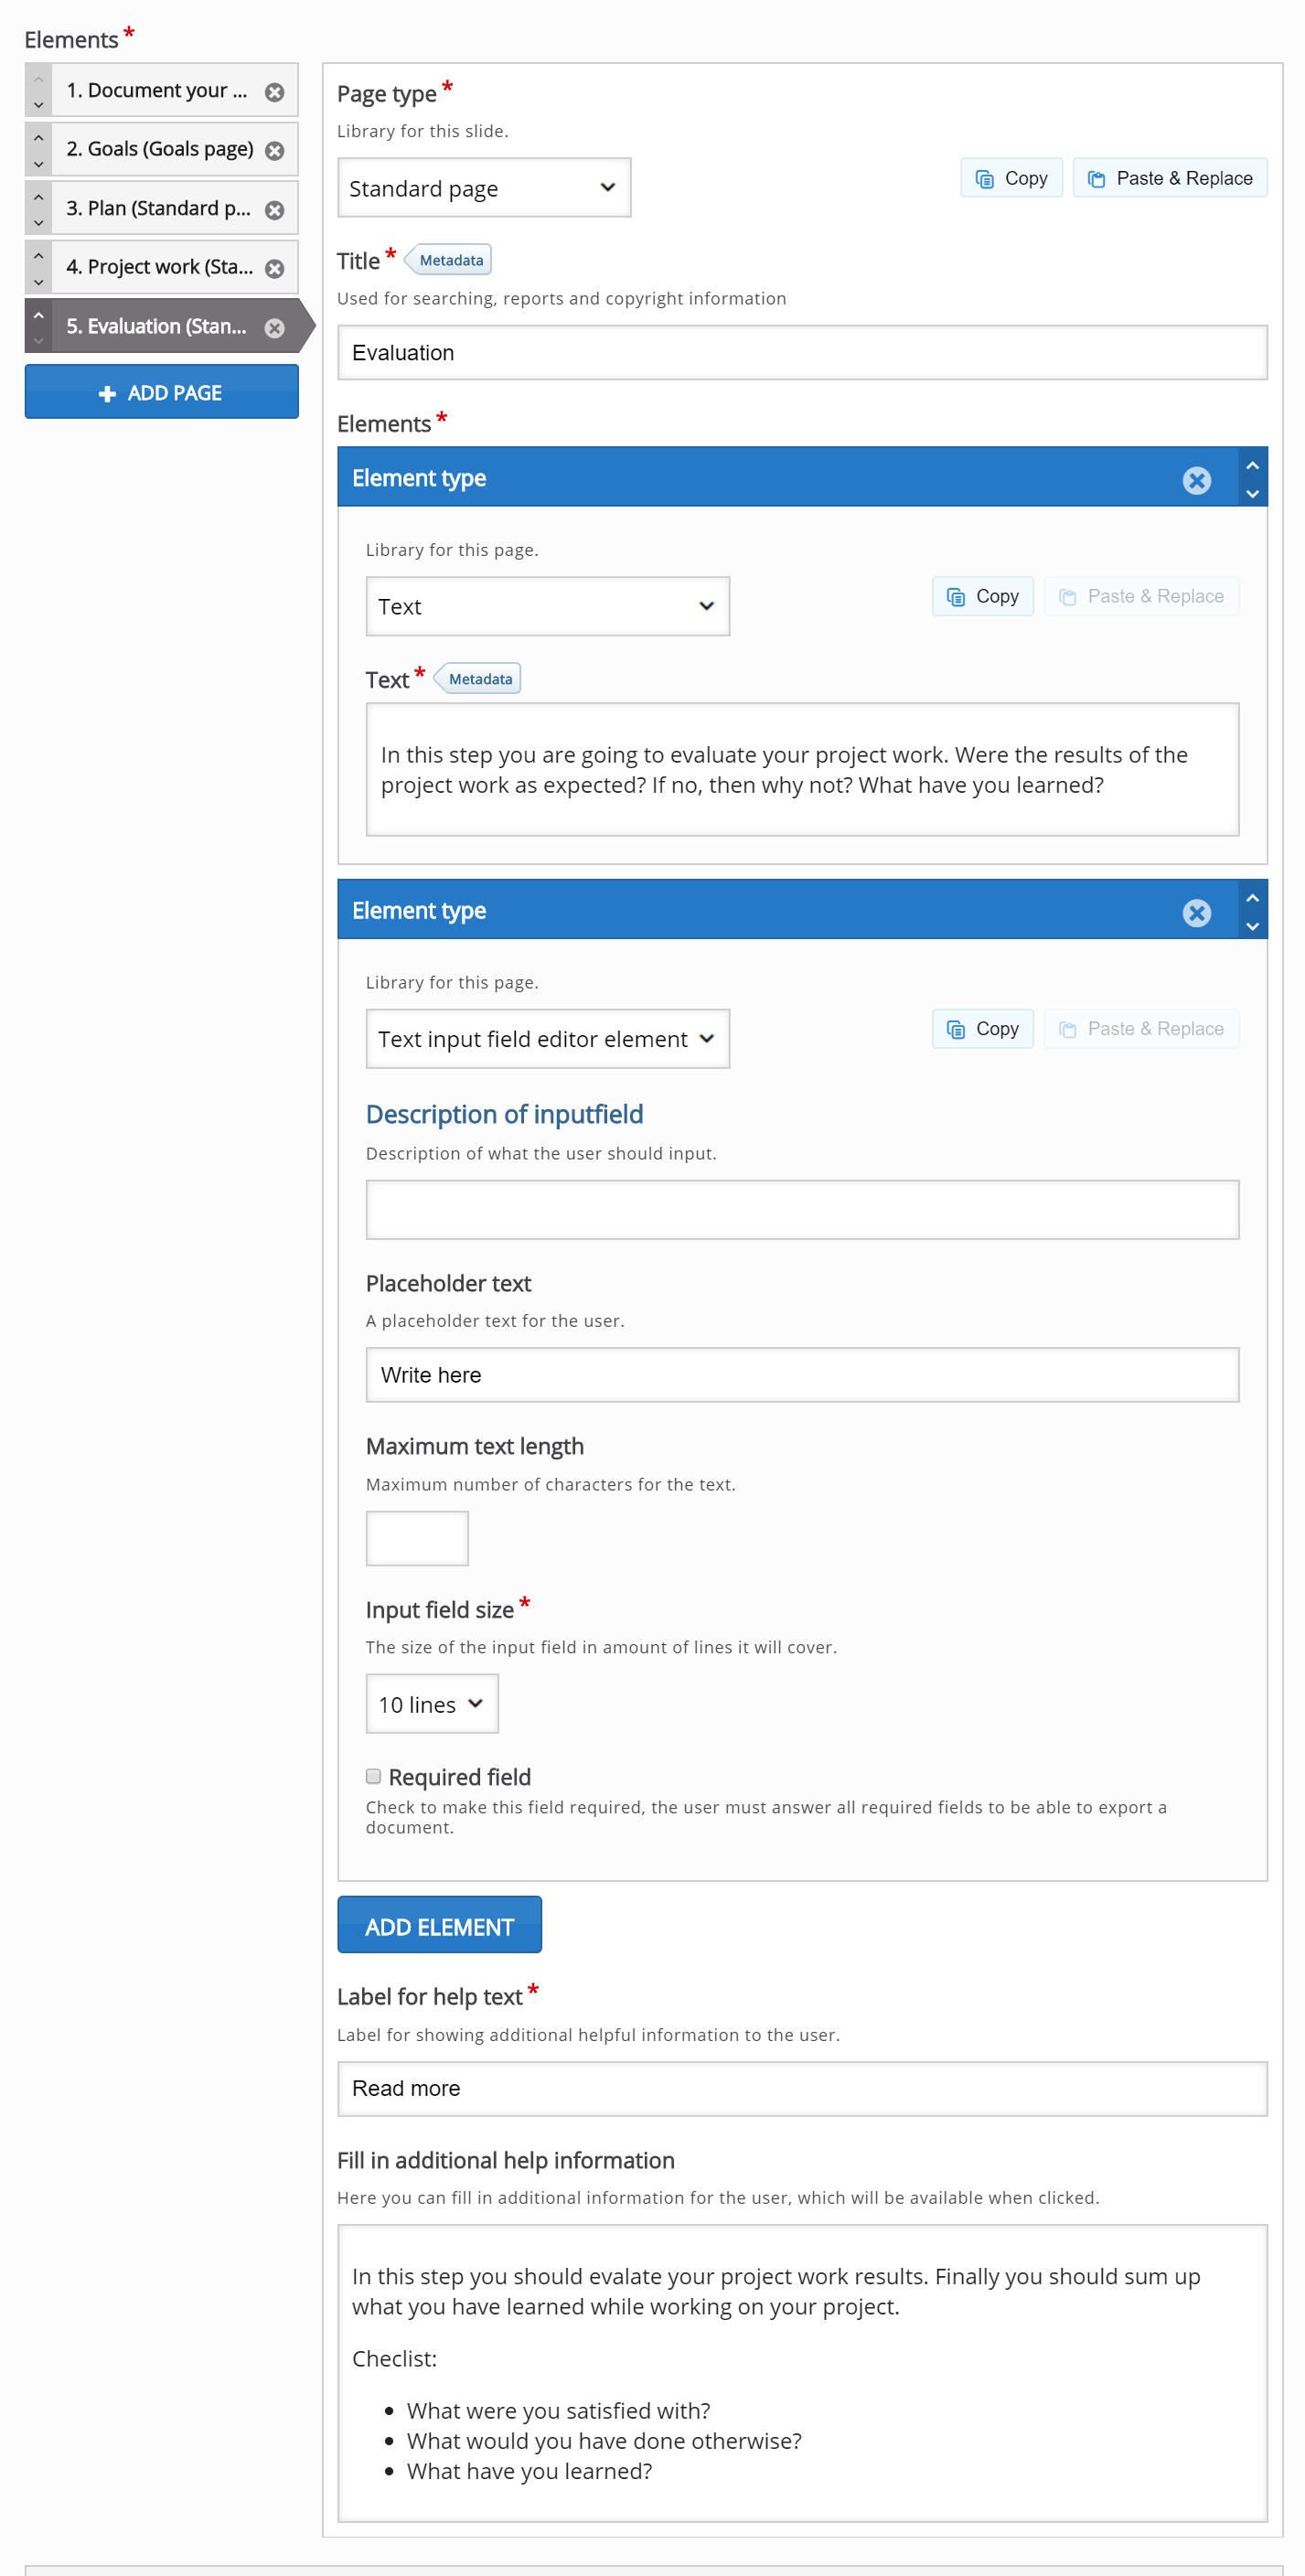
Add Goals Assessment Page
Press the Add Page button to add another page to the Documentation Tool.
This time, we'll choose Goals Assessment Page from the drop-down menu.
The Goals Assessment Page editor will now appear.
Add the exact same content for Goals Assessment Page as in the Documentation Tool mentioned in the below example.
After adding content to the Goals Assessment Page you should have something like this: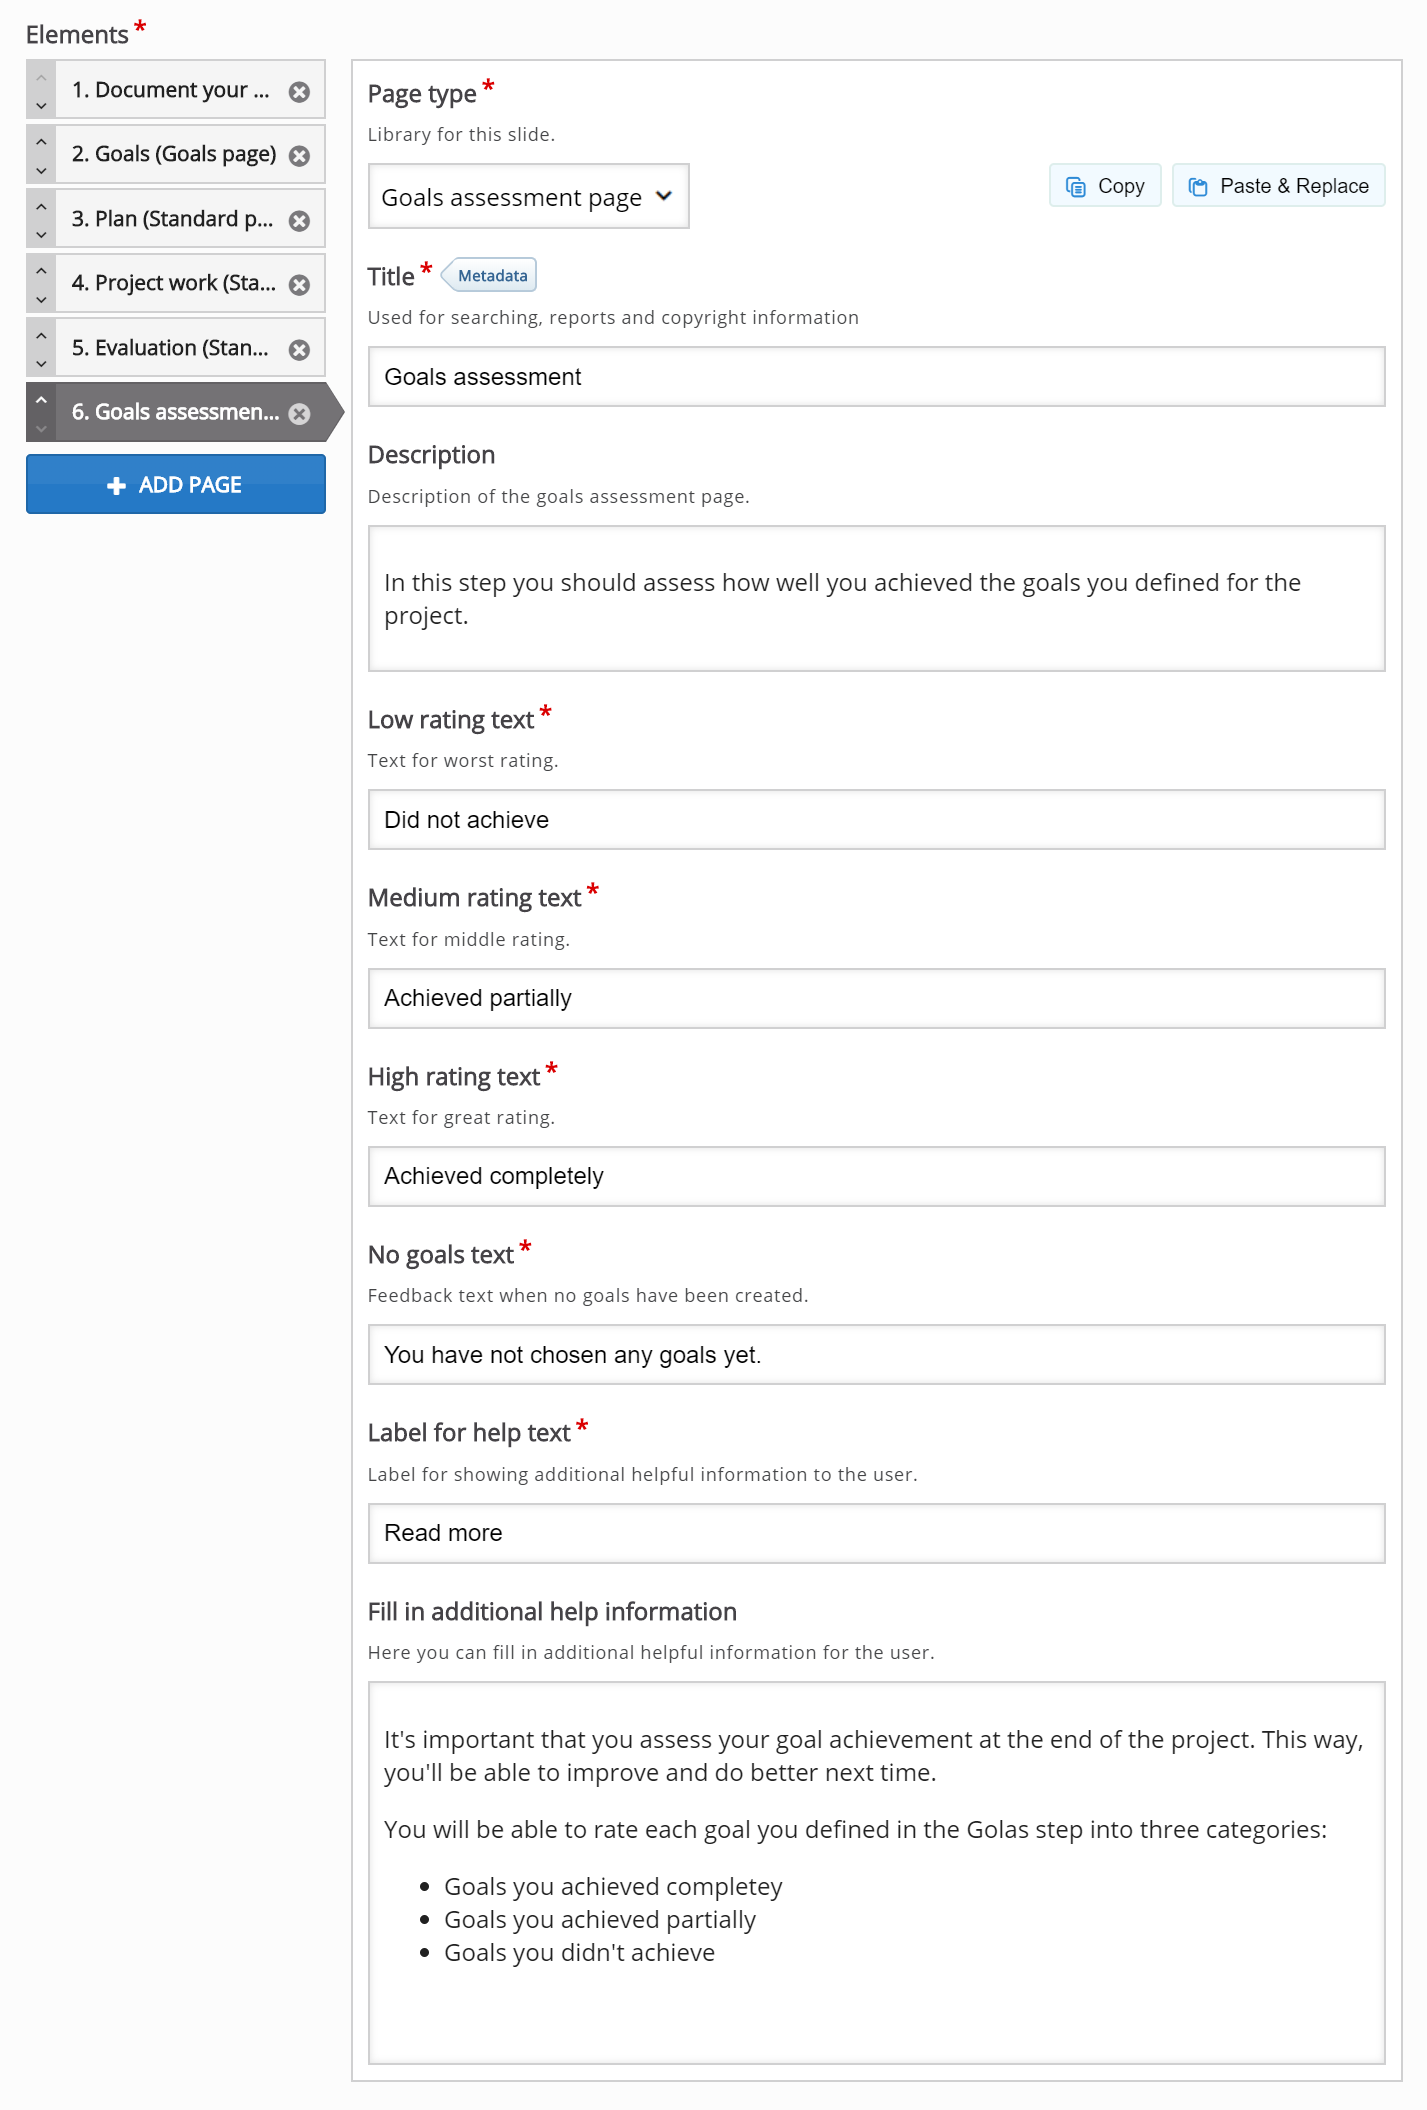
Add Export Document Page
Press the Add Page button to add another page to the Documentation Tool.
This time, we'll choose Document Export Page from the drop-down menu.
The Document Export Page editor will now appear.
Add the exact same content for Document Export Page as in the Documentation Tool mentioned in the above example.
After adding content to the Document Export Page you should have something like this: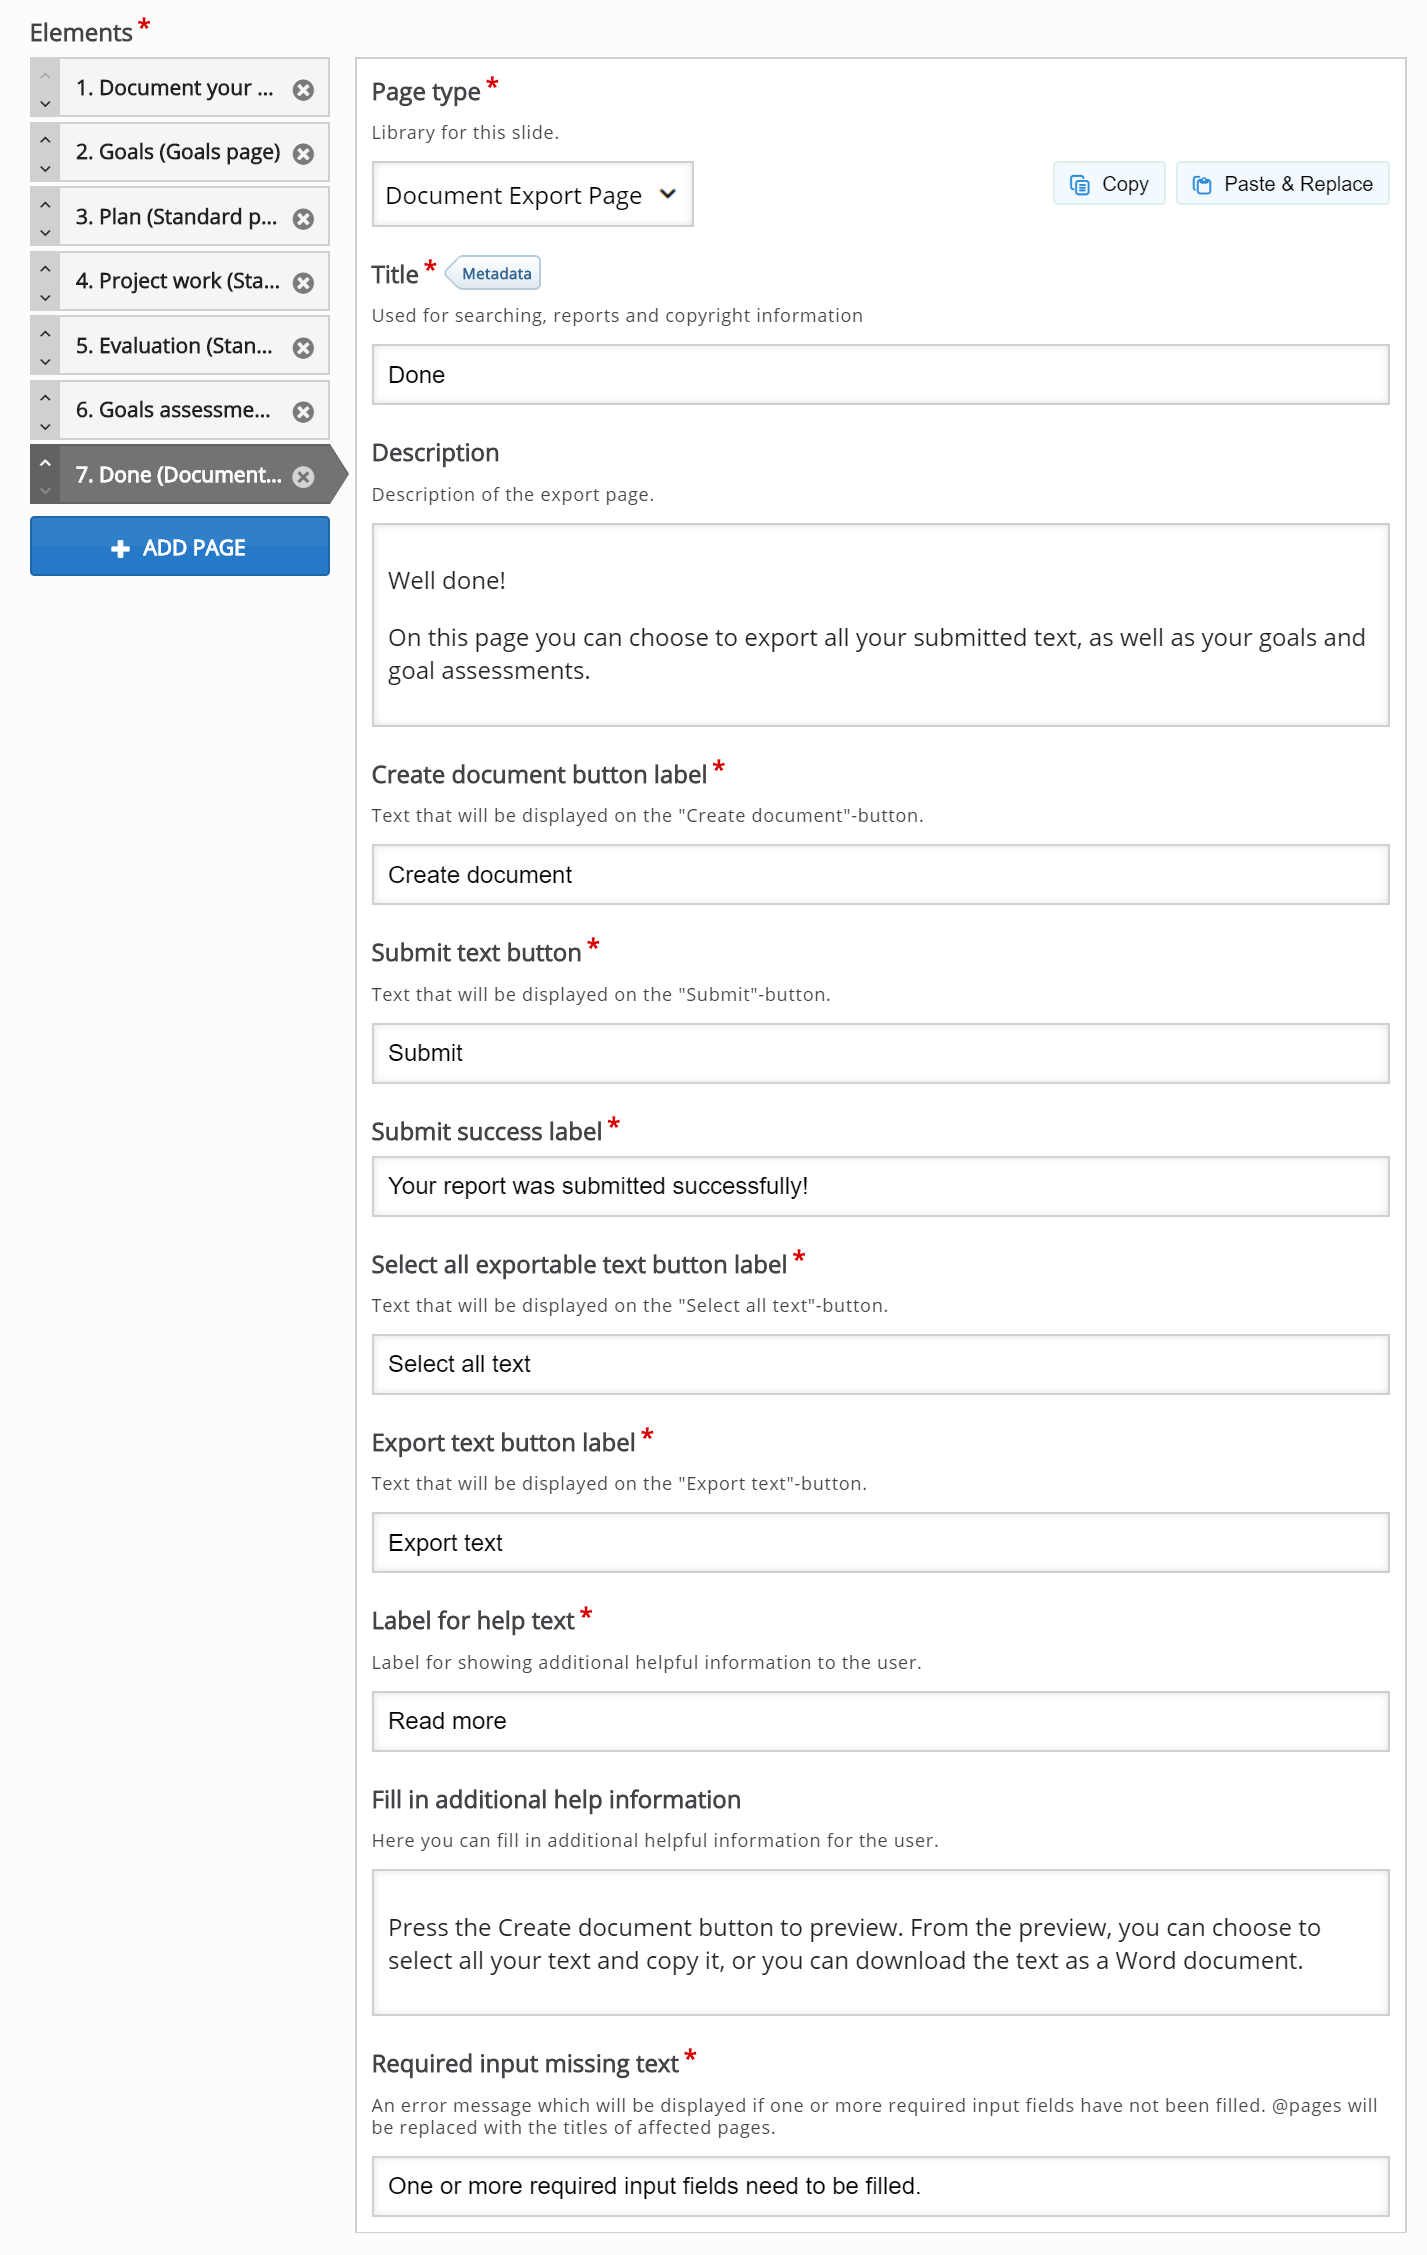
Finishing up
Save and Insert your finished Documentation Tool.
.png)