Virtual Tour (360)
The H5P Virtual Tour (360) allows 360 (equirectangular) and normal images to be enriched with explanations, videos, sounds and interactive questions.
The images create scenes that also may be linked together to give the user an impression of moving between environments or between different viewpoints within the same environment. It can be used for creating virtual tours through rooms where each part of the room is explained in detail using text or images and also may contain questions for the one exploring.
Accessing H5P in Canvas
You can access H5P in Canvas through the Rich Content Editor (RCE), which is accessible via the edit view of Page, Assignment, Discussion Board, Announcement and Quiz questions.
For this example, we will be adding H5P onto a Canvas page. The first thing you will need to do is either open the page you want to embed the H5P content into or create a new page. Then click the ‘Edit’ button which will open the RCE. (You will automatically go into edit mode if you create a new page.)
Next, you will need to locate H5P in the RCE toolbar by clicking on the H5P icon highlighted in red

Clicking on that menu item will open a pop-up showing your H5P library.
Select Add Content .
A search bar will pop up and type in Virtual Tour. Select Details and Use
Creating a Virtual Tour
You will now see your Virtual tour editor.
Add your title. 
Add a first 360 scene
We are going to add our first 360 scene now.
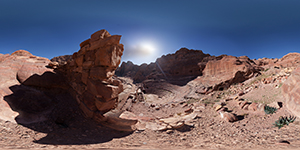
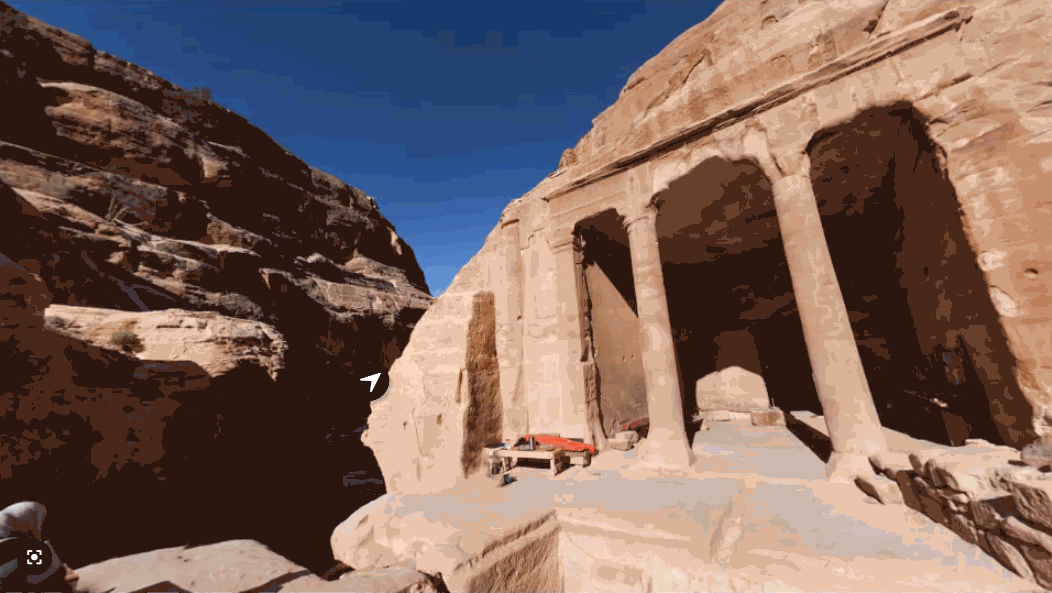
First, add a background image. This is the image we'll use in our example:
To add a scene click "New scene" 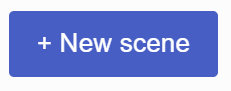 button.
 Type in the title and upload the background image.
The scene popup should look like this:
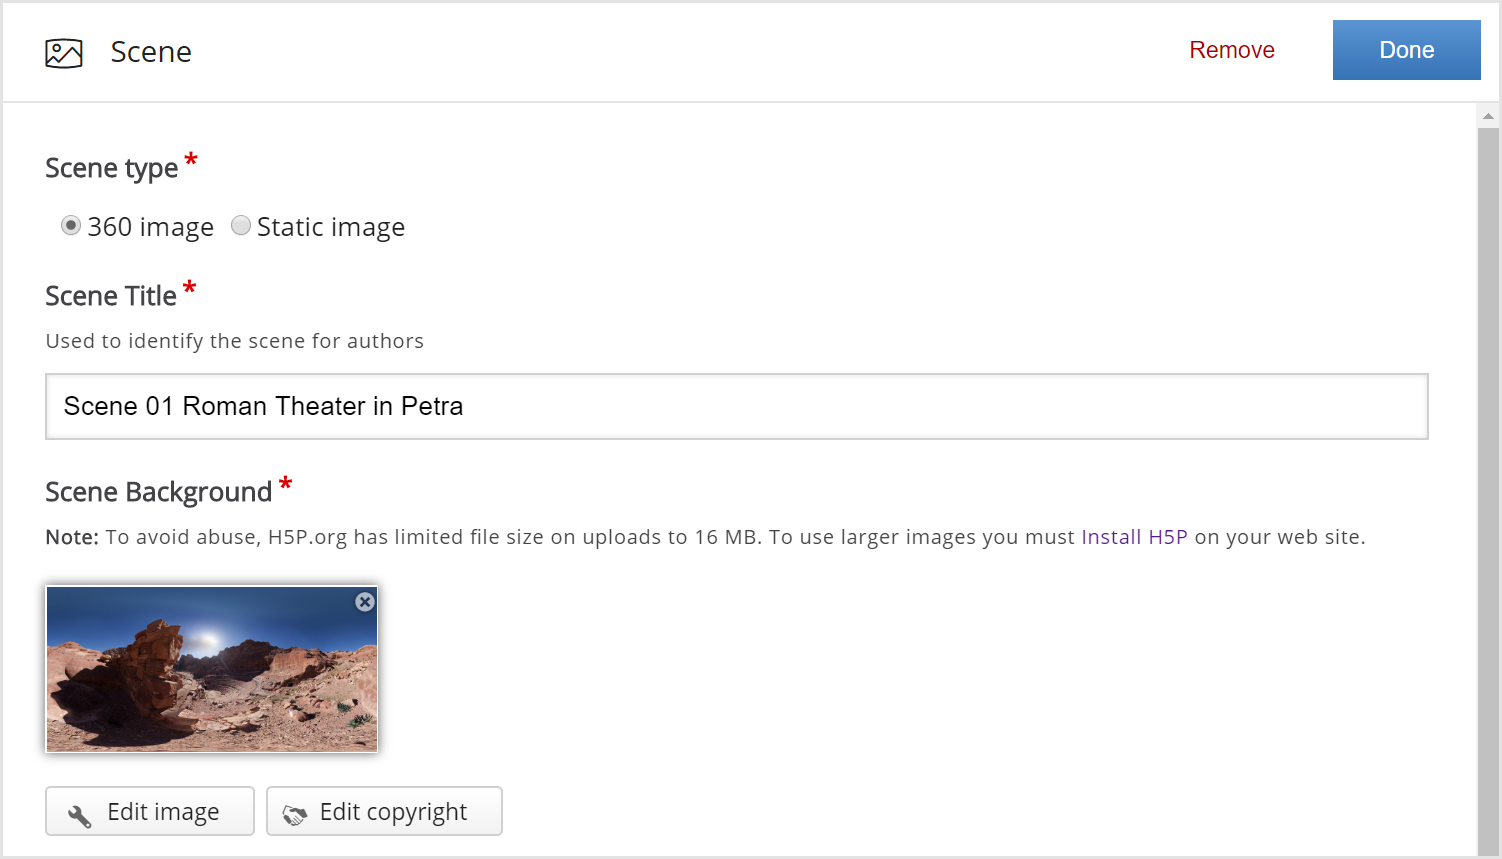
Don't forget to add licensing info for the background image.
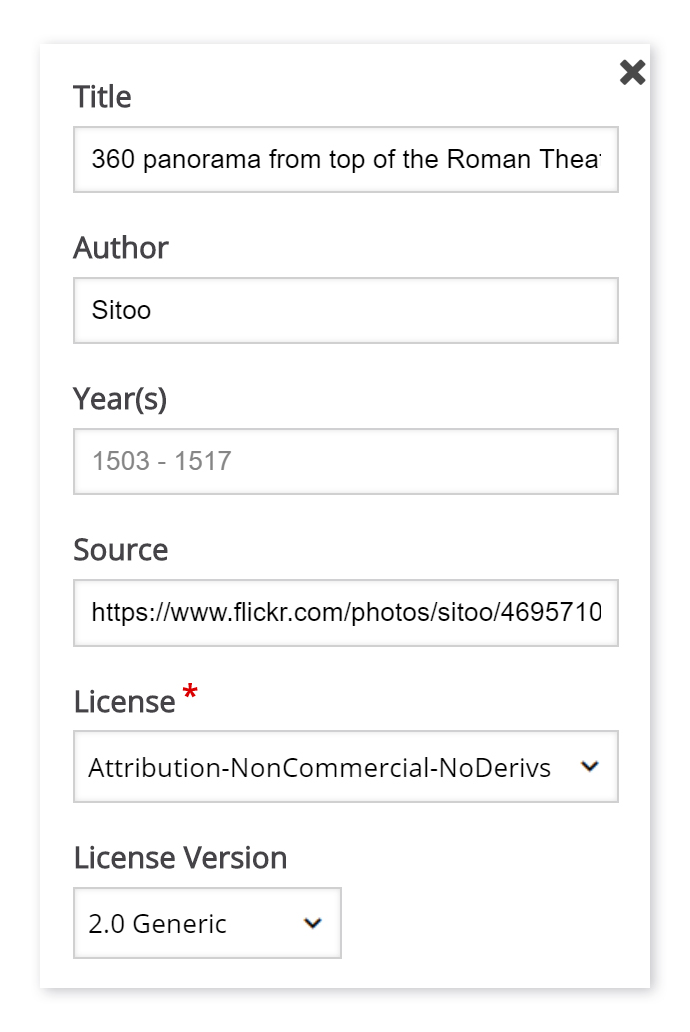
Click Edit copyright and fill in.
Details of copyright should look like this :
Click Done. The first scene is now added.
The editor should now look similar to this:
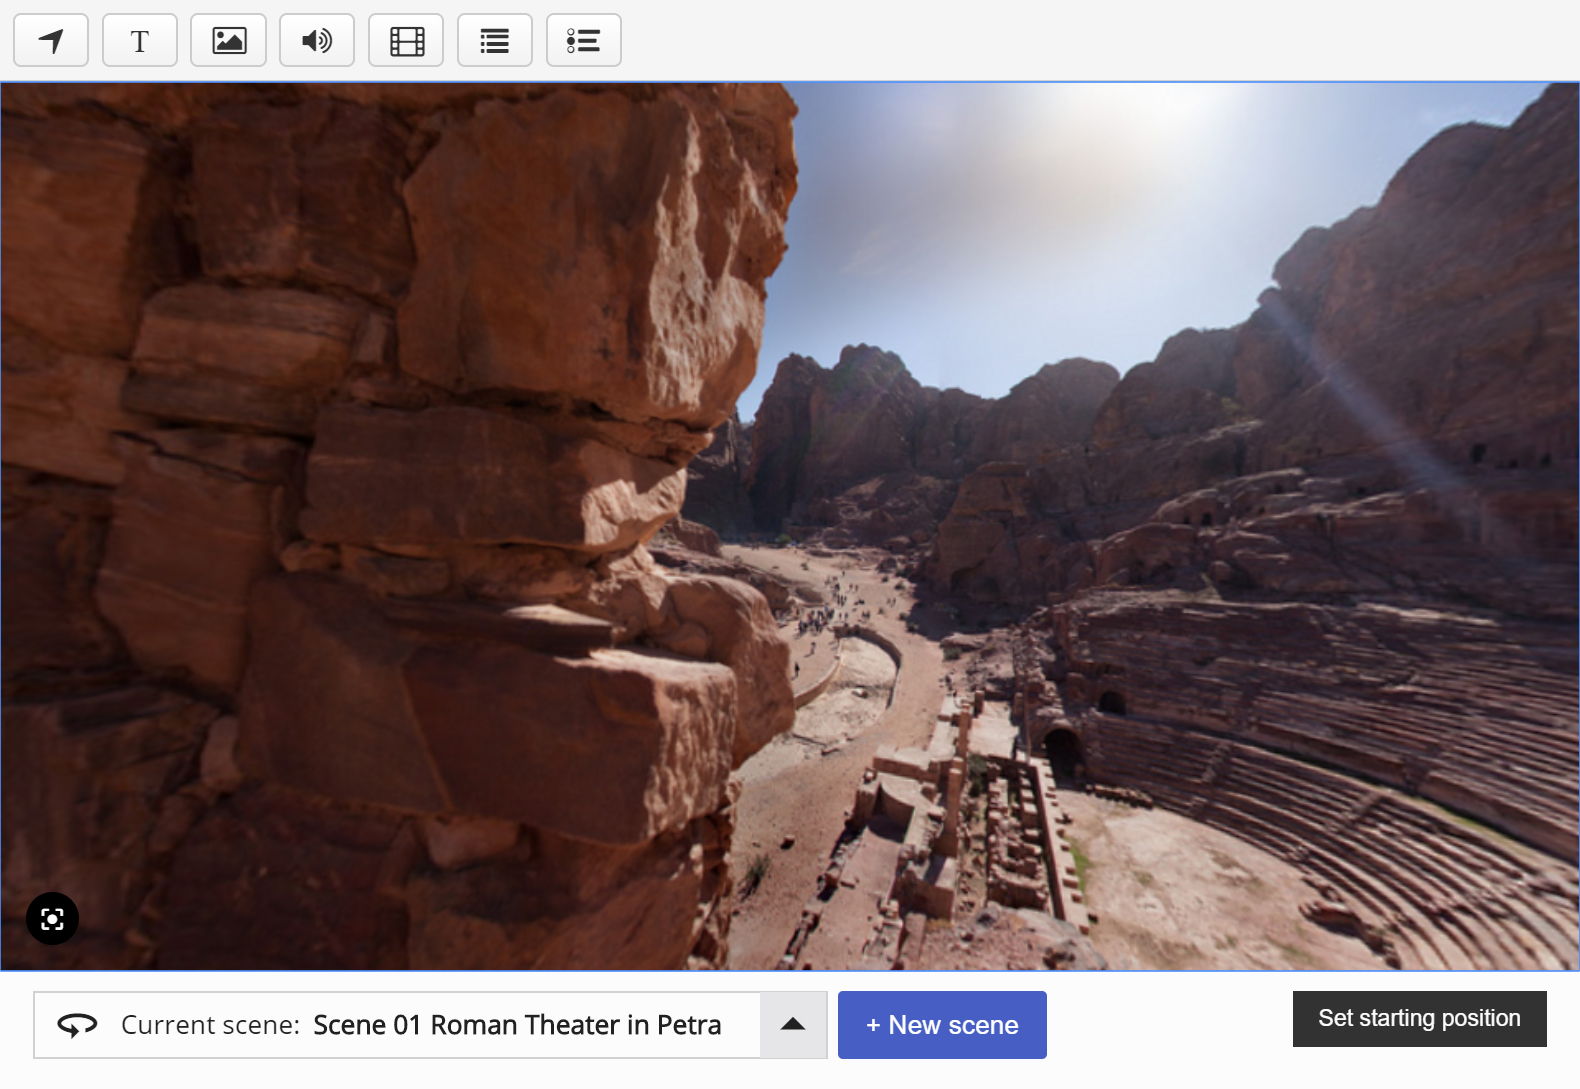
The starting camera angle is set by default. If you want to change the camera angle you can move the scene by dragging it with your mouse. Once you've set the view to the starting angle you like, press the "Set starting position" button in the bottom right corner. Now your scene will always start with this camera angle.
Add a second scene
Same as with our first scene, click the "New scene" button.
Add a third scene, this time a static scene
Follow the same process but select click the Static scene instead of 360 scene
Click Done You've added your third scene.
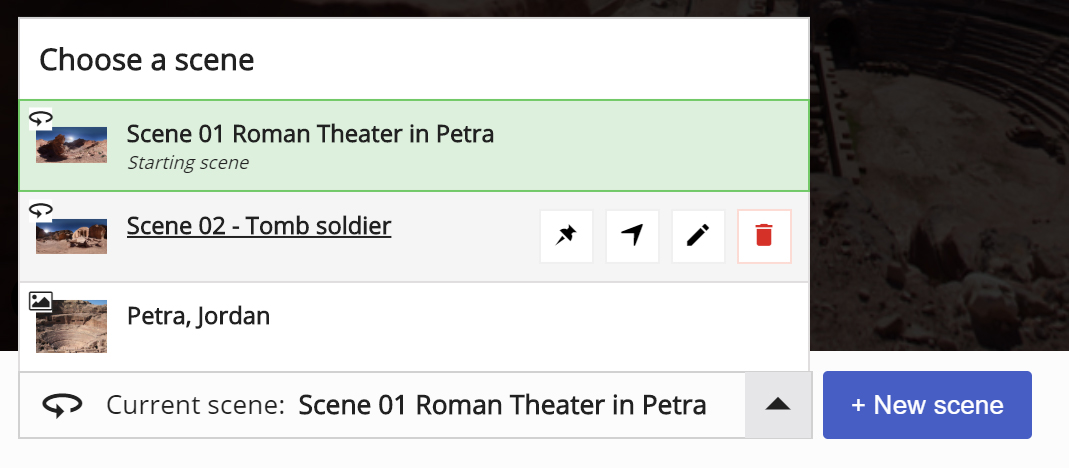
Navigate between scenes
Now we have three scenes.
To navigate between scenes, click the dropdown in the bottom left corner where it says Current scene.
The Scene selector will open and you will see all of the scenes you have created so far.
Here is how it looks:
Explanation of each part of a scene selector:
|
| Icons above the image
| This icon indicates if the scene is  static static or  360. 360. |
|
| Green outline and green background
| This is how we mark the currently selected scene (the one we are working on now)
|

|
| "Set as starting scene" button
| Click here to set this scene as the starting scene for your content. The Starting scene is the first scene end user sees.
|

|
| "Go to scene" button
| Click this to open the scene
|

|
| "Edit" button
| Click this to edit the scene ( Background, Title, Description, etc.)
|

|
| "Delete" button
| Click this to delete the scene
|
Connect scenes
As an author, you can navigate between scenes by using the scene selector.
In order for users to move from scene to scene, you need to add some navigational elements.
Navigational elements are created using the Go to scene tool, placed in the top menu.
Create some navigation.
Click on the scene selector and go to our 1st scene.
We want to create navigation from this scene to scene #2.
Click on the "Go to scene"  icon in the top menu.
A dialog like this will appear:
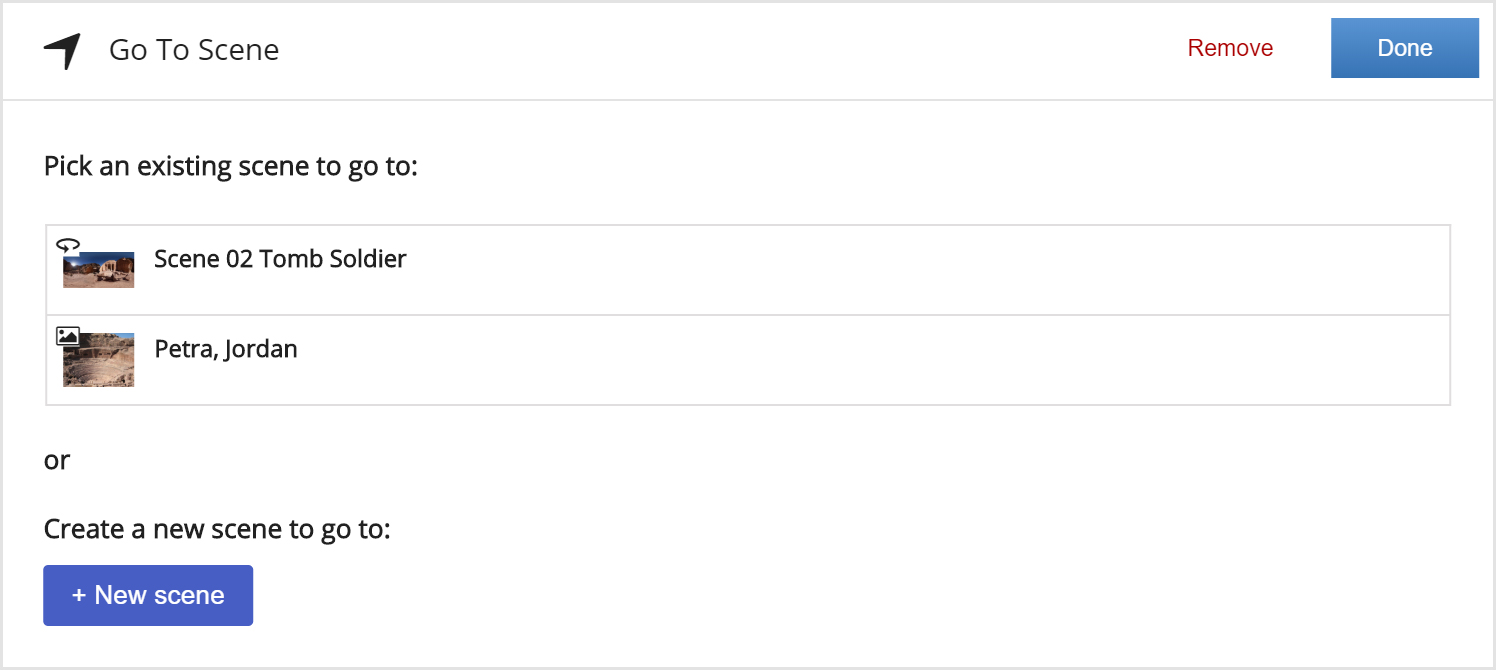
Pick "Scene 02" and click Done.
The new navigational element will appear in the scene:

The user will use this button to go from scene #1 to scene #2.
You can reposition this element by dragging it around the scene.
When you click on it you'll get a context menu (like shown in the image above)
- 1st option Go to scene will navigate (open) the scene that the Go to object leads to
- 2nd option will edit the Go to object itself
- 3rd option will delete the Go to object itself
Now create navigation from scene #2 to scene #1.
Click on the scene selector and go to the 2nd scene.
Click on the Go to scene icon in the top menu, select "Scene 01"
and click Done.
Now we have navigation both from scene #1 to scene #2 and vice versa.
Tip: When you have created a "Go to" object you can double click on it and it will open the scene that it points to. This can save you some time!
The last navigation element we want to add is from scene #1 to scene #3 (static scene).
Click on the Scene selector and pick scene #1.
Click on the Go to scene icon in the top menu, click Done.
We've got one additional Go to scene element in our scene #1. It should look like this:
Double click on the second Go to interaction.
You will navigate to the static scene.
Notice that this scene has a "Back" button in the top left corner:
A static scene has an optional Back button and it is checked by default when you create a static scene.
This is what the option looks like:

Of course, you can turn this Back button off and create a Go to scene element yourself instead.
Add interactions
Once the navigation is set up we we will now add some interactions to our scenes.
Adding an Image
First, we will add one image interaction to scene #2.
Navigate to scene #2. Click on the  icon in the top menu.
A dialog will appear.
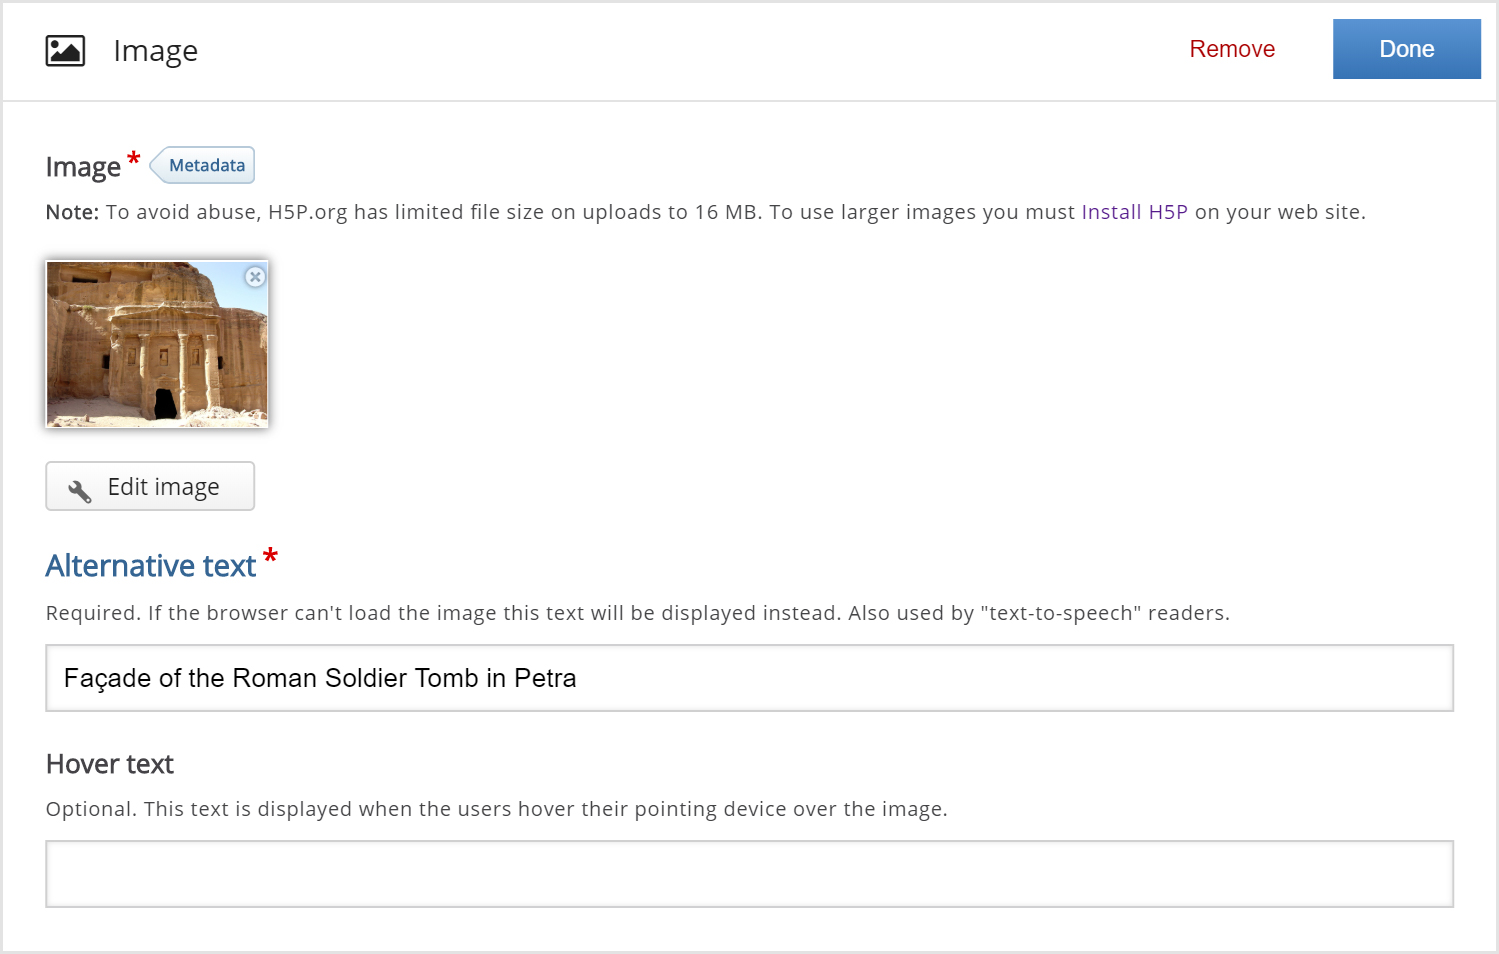
Upload the image and add alternative text as shown here:
Click Done.
You've added your first interaction.
Drag it around and position it as shown here:
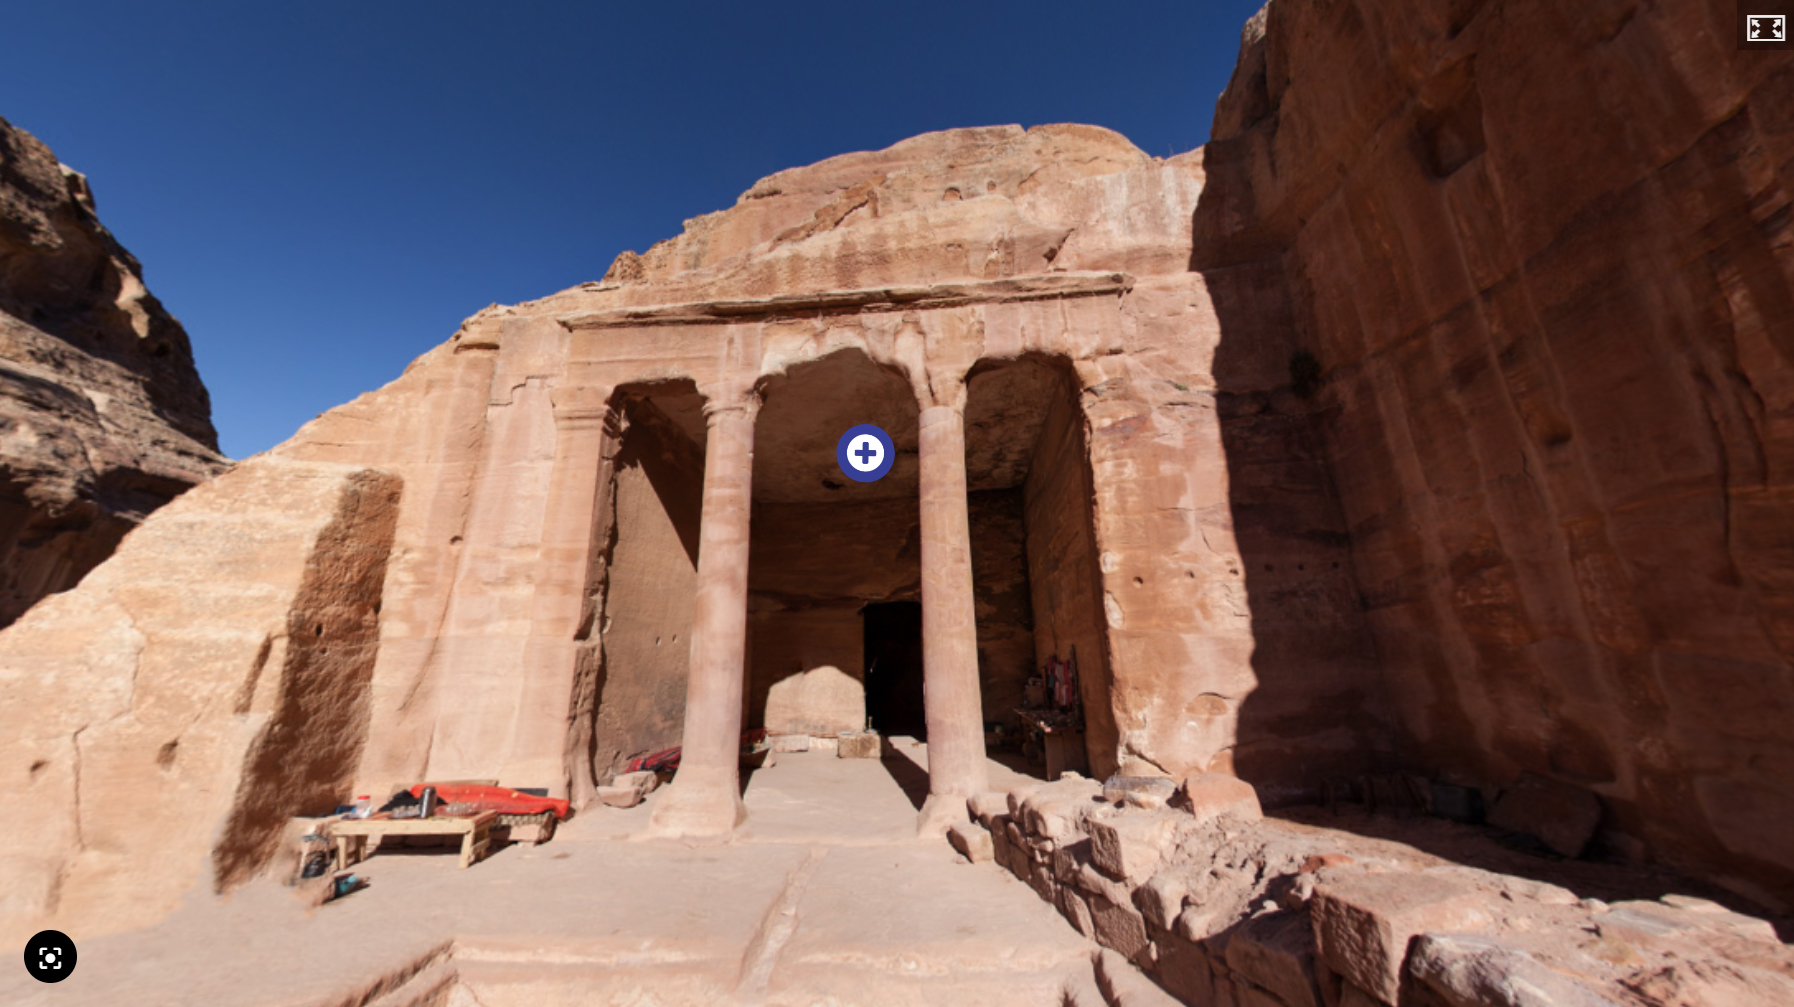
Now, we will add three interactions to our static scene (scene #3):
- text about the theatre
- video
- image of the entrance.
Click on the scene selector and pick scene #3.
Adding Text
Add the text interaction .
Click on the  icon in the top menu.
A dialog will appear.
Copy and paste your text into the dialog, it should look something like this:

Click Done. The text interaction  should show in the middle of the scene.
 Drag it to reposition it.
Adding a video
Second, we will add some video.
Click on the  icon in the top menu.
A dialog will appear.
Add the title and the source.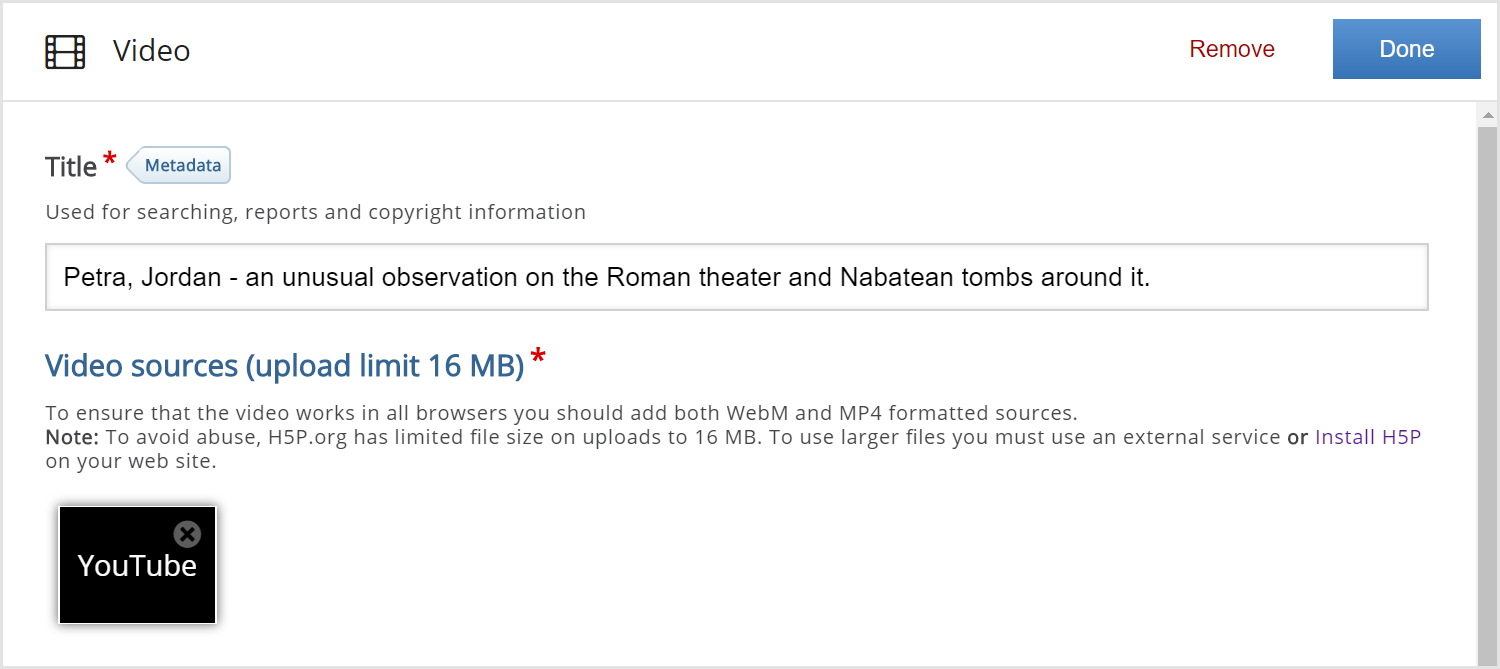
Click Done.
The video interaction should show on the scene. Drag it to reposition it.
Click Done.
You've added your third interaction to this scene.
Drag interactions around to reposition them. You should get something like this: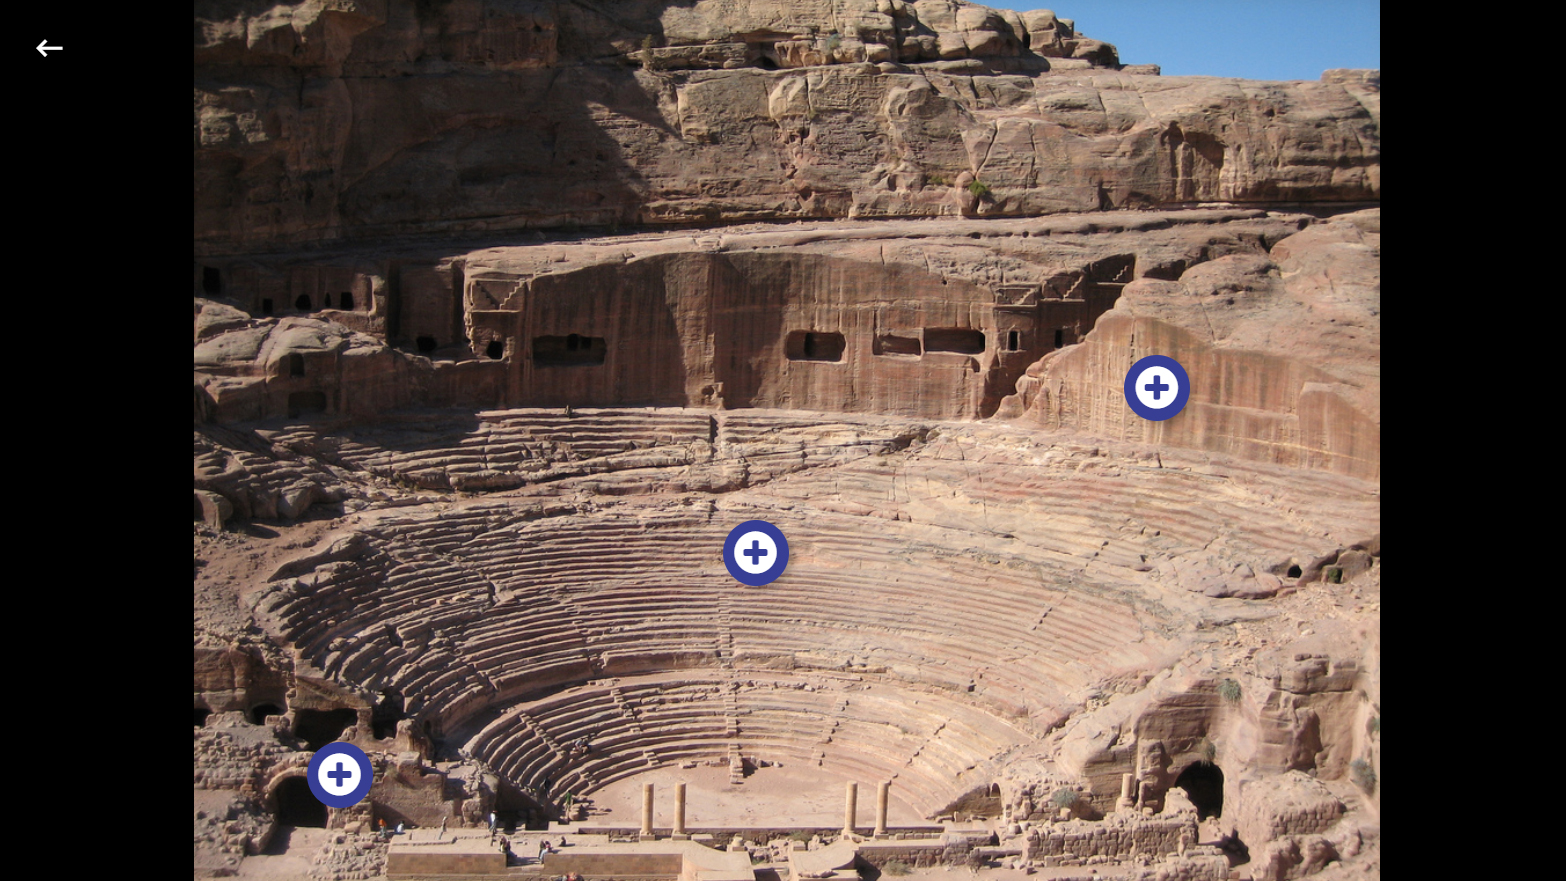
Save and Insert to view your finished Virtual Tour (360).