Find a Hotspot
This content type allows learners to press somewhere on an image and get feedback on whether that was correct or incorrect according to the task description.
The creator uploads an image and defines various hotspots corresponding to details or sections of the image.
Hotspots can either be defined as correct or incorrect, and the author provides appropriate feedback text in both cases.
The creator can also define feedback if the learner presses somewhere which is neither define as a correct or incorrect hotspot.
Accessing H5P in Canvas
You can access H5P in Canvas through the Rich Content Editor (RCE), which is accessible via the edit view of Page, Assignment, Discussion Board, Announcement and Quiz questions.
For this example, we will be adding H5P onto a Canvas page. The first thing you will need to do is either open the page you want to embed the H5P content into or create a new page. Then click the ‘Edit’ button which will open the RCE. (You will automatically go into edit mode if you create a new page.)
Next, you will need to locate H5P in the RCE toolbar by clicking on the H5P icon.
Clicking on that menu item will open a pop-up showing your H5P library.
From here, you will have the option to either insert previously created content or create something new.
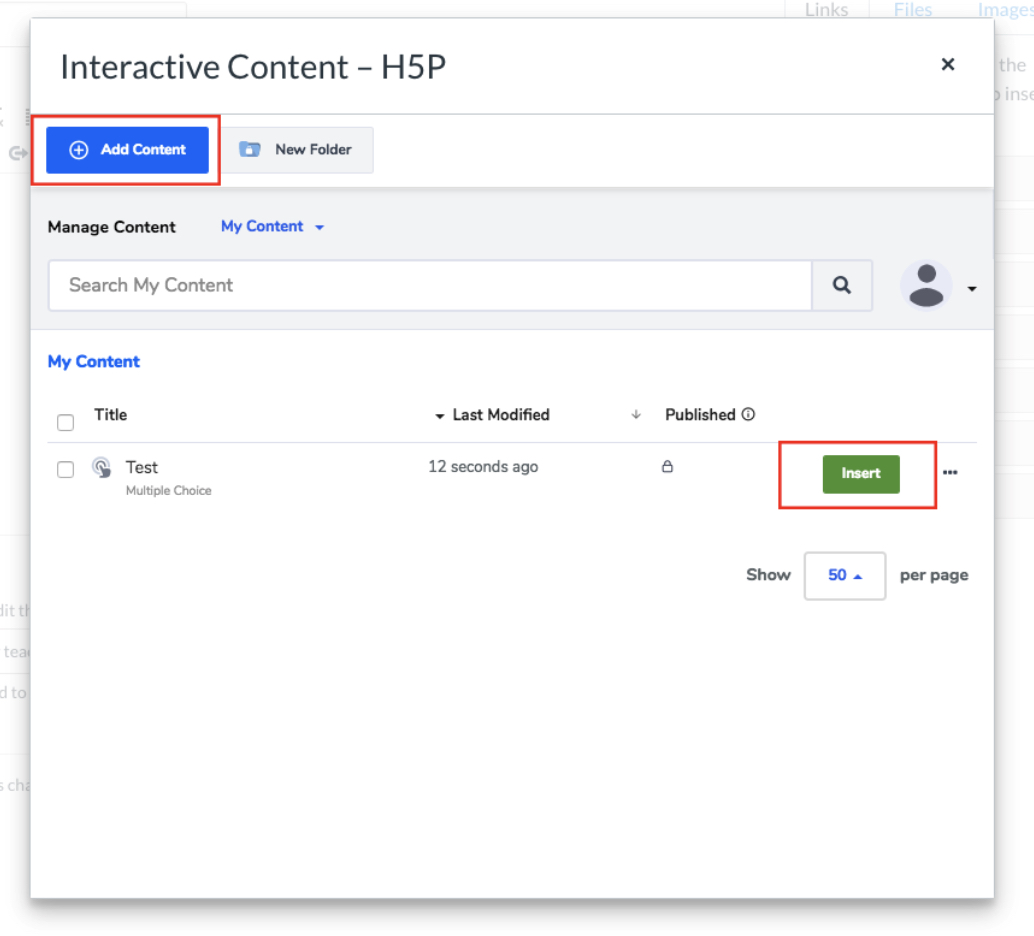
Choose Add Content and a search bar will pop up.
Type Find the hotspot in the search bar and then choose it from the options provided.
Add a Title.
This will not be visible to your learners but can be used for searching, reports and copyright information.

Add Image and Hotspots
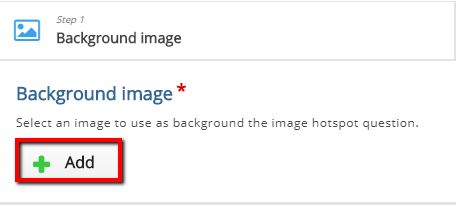
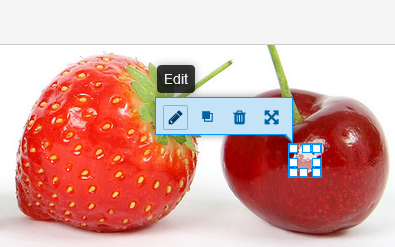
Under Background image, click the green plus icon ![]() to choose the image that you will place hotspots on for this activity.
to choose the image that you will place hotspots on for this activity.
For example, this could be a model from your course content.
Click the Hotspots tab to start placing hotspots on the image you have uploaded.

In the Hotspots tab, enter your Task description.
This will explain to the student what they need to do to answer the question, so make it a short, direct instruction.
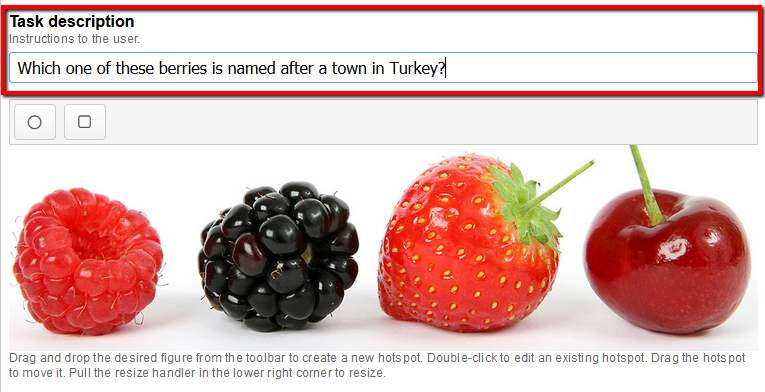
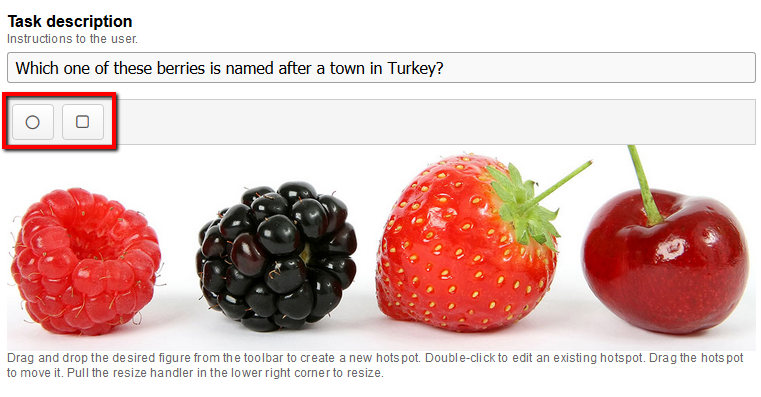
Click one of the buttons in the bar above the image to place a circular or square hotspot.
Choose the shape that is going to cover the most area of the object in your image - for our example, we're going to use a circle.
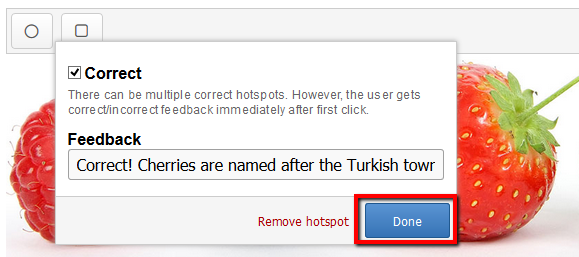
A pop-up box will open for the details of this new hotspot.
Tick the Correct tickbox if this hotspot is a correct answer.
You can have as many correct answers as you like or leave it unticked for an incorrect answer.
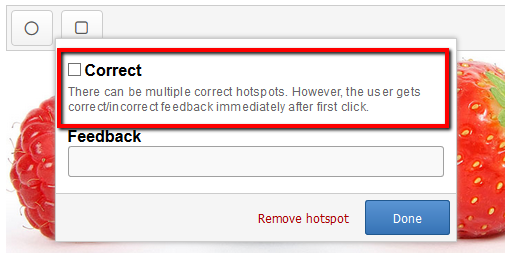
Enter some Feedback for the hotspot based on whether it is a correct or incorrect answer.
One or two sentences work best.

Click Done to place the hotspot on the image.
The hotspot will appear on the image. Click and drag it to the corresponding part of the image based on your feedback.
Remember, the hotspot will not be visible to students.
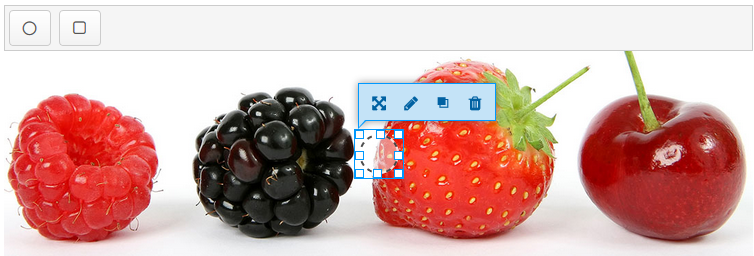
You can edit, reorder and delete hotspots by clicking on them.
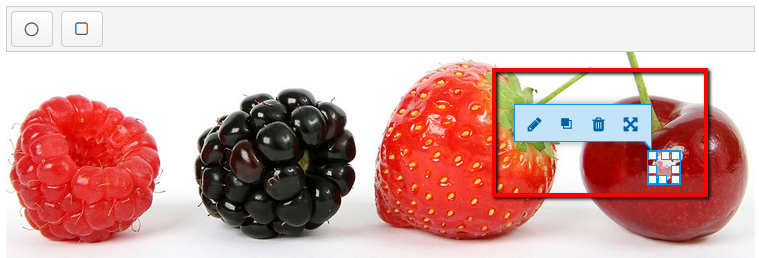
Click the pen icon  if you need to Edit the details you have entered.
Keep placing hotspots until you have added all your desired answers to the image.
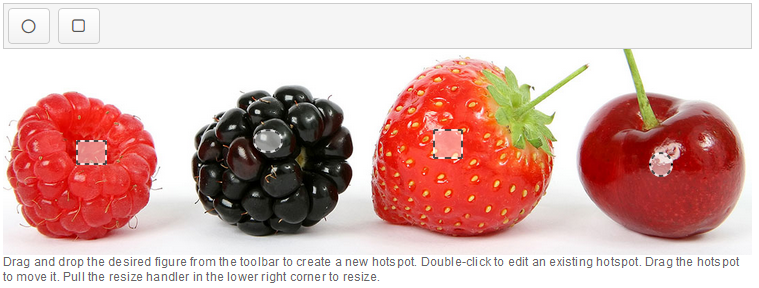
Adjust the size of each hotspot by dragging it at the corners, so that it covers the whole answer area.
This is important, as the hotspots you have placed will not be visible to students.
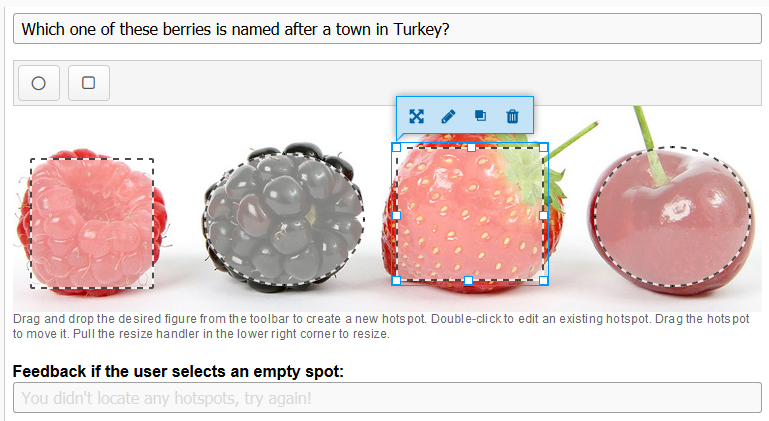
Add some Feedback for clicks in blank areas.
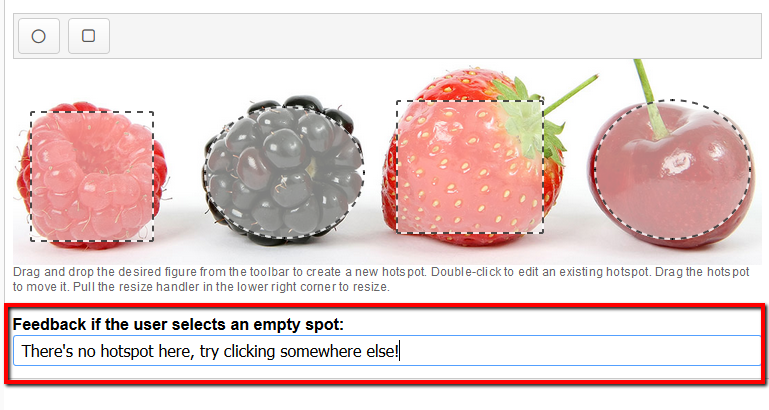
When the learner looks at the photo, the hotspots will not be visible to them.
The learner simply clicks on the berry which they think is called after a town in Turkey.
If they choose the wrong berry they will get feedback to say their answer is incorrect.
If they choose the right berry, they will get feedback to say their answer is correct.
Click Save and Insert.